The Complete Idiot’s Guide to Speed Reading (2008)
Part I. Getting Up to Speed with What You Read
Chapter 2. Winning Hands Down
In This Chapter
• Help from your hands
• The importance of column width
• Finger methods 101
• Keep your place and concentrate
• Turn, turn, turn the page
Pick up any speed reading book, including this one, and you’ll find information on the value of using a hand or card as a guide when reading. This is, hands down, the best strategy for increasing your reading speed. In this chapter, I introduce you to 13 proven ways you can use your hands or a card to improve your reading speed. It’s your job to figure out which one(s) work best for you.
But here’s the tricky part: you’ve probably been reading without using your hands, so you can expect to enter your discomfort zone, albeit temporarily, when you try the methods in this chapter. But the positive results you get from using these methods, including a speed increase and stronger concentration (which in a short time leads to better comprehension), will sell you on the need to use them. And the more you use them, the more comfortable you will become. Try them all on a variety of materials and decide which one(s) are best for you!
Faster Reading at Your Fingertips
Perhaps the concept of reading with your fingers isn’t as foreign to you as you might think. After all, when you look for a number in the telephone book, do you use your finger to read down the columns of names? Or when you’re looking back in an article you read for some important fact, do you use your fingers to skim down the page? Many people do.
def·i·ni·tion
A pacer is a visual guide—your fingers, whole hand, or a card to move your eyes down and across the lines of text with the results of increased concentration and faster reading speeds.
Using your hands or a card, or any other kind of pacer when reading has many benefits:
• It forces your eyes to focus on a line or section of words.
• It naturally encourages concentration.
• It forces your eyes to move in a directed pattern across and/or down the page.
• It guides your eyes to keep their place and to find the next line accurately.
• It involves more of your body in the reading process, which keeps you alert.
• It capitalizes on the human phenomenon where your eyes naturally follow movement. (If you are reading at the kitchen table and a fly flew over the table, your eyes would be attracted to it. If you were sitting in a room with windows, anything that went by the window would attract your eyes and attention. So intentionally putting movement on a page will encourage your eyes to follow that movement.)
• Ultimately, it allows you to read with speed!
Speed Secret
When you read, you use your eye muscles to push and pull your eyes across and back over lines. Your hand is a stronger muscle and, when added to the page, adeptly forces your eyes to move along with it.
Using a pacer is the best way to get into high gears while reading. If you want to get into third, fourth, or fifth gears, add your hands or a card to the page!
When to Use Pacers, and When You Don’t Need To
Readers new to using pacers sometimes believe they have to use the method all the time and on everything. At first, you do want to experiment with it on all your reading. The more practice you have, the quicker you’ll get used to reading with a pacer and the more comfortable you’ll become reading at faster speeds.
Think of a race horse and jockey. The horse comes out of the gate with a lot of energy, and the jockey uses the riding crop repeatedly to stir the horse into keeping pace with the other horses. He doesn’t have to use the crop when the horse is running fast. However, when the horse’s energy starts to falter, the jockey uses the crop to push the horse toward the finish line with speed.
Reading with a pacer is a similar process. You start reading using your preferred method with a lot of energy and speed. As you continue to read, you find your eyes and brain reading quickly on their own and naturally find that you don’t need the pacer. Then for many reasons, such as coming upon unfamiliar material, excessive daydreaming, or various interruptions, you see your speed slipping. Now’s the time to use your pacer again to get you back up to speed.
Speed Tip
Use pacers to help you focus, concentrate, and stay awake, especially when you have a lot to read and not much time to do it in.
Some Challenges Ahead
Try all the pacers in this chapter, even if it’s only for a minute for each, so you can find the ones that work best for you. Start by experimenting with some of your own reading material—any text will do. Then move on to the articles in Appendix B.
Force yourself to read faster, and remember that it’s okay to forego comprehension while you’re in this learning phase. Push your fingers or card faster than you’re comfortable so your eyes will get used to viewing text faster than your brain can process. This potential loss of comprehension is temporary and will come back the same—or better!—in a short period of time with experience.
Columns: Wide or Narrow?
Which do you think is easier to read, wide columns or narrow columns? Wide column text takes up the entire print space of the page going from the left margin to the right, making the lines you read long as well as the return sweep of your eyes back to the next line. The average number of words in a wide column, either on paper or on-screen depending on the page size, is 18 to 25 words. Research recently conducted by IBM shows that readers of wide columns with long line lengths have less comprehension and regress more than readers of narrow columns.
def·i·ni·tion
Regression, also known as back-skipping, is when your eyes go back over words they’ve already read.
Narrow column text is laid out in columns of six to eight words across, making the eyes sweep more across the lines but reducing the need to regress. The IBM research showed readers of shorter line lengths read a little faster and had better comprehension than those reading longer line lengths. Newspapers and magazines use narrow columns because they pay attention to the research and know people can read and absorb better when reading narrow columns.
Speed Tip
When reading wide or narrow columns, use a pacer to help you keep your place and reduce regressions. You can also use other reading strategies like reading bigger words and thought chunks to keep your eyes moving fluidly across the lines (see Chapter 4).
In preparation for experimenting with these hand and card strategies, find some reading material that contains wide columns (long line lengths) and narrow columns (short line lengths). (Magazines typically have some of both.) Sit at a desk or table so your reading material is on a hard surface, not on your lap or suspended in the air.
Single Finger Methods
Reading with one finger is a simple way to familiarize yourself with reading with your hand, and I introduce you to five different finger methods in the following paragraphs:
• Left Pointer Pull (B)
• Right Pointer Pull (B)
• Center Pointer Pull (N)
• Z Pattern (N)
• S Pattern (N)
You’ll notice the similarities between the five methods, but each one is unique and worth practicing to help you determine the best methods for you.
Left Pointer Pull (B)
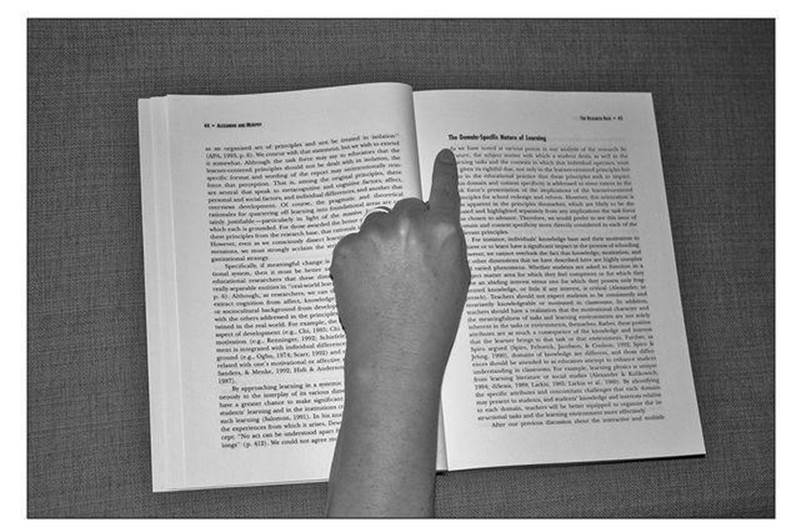
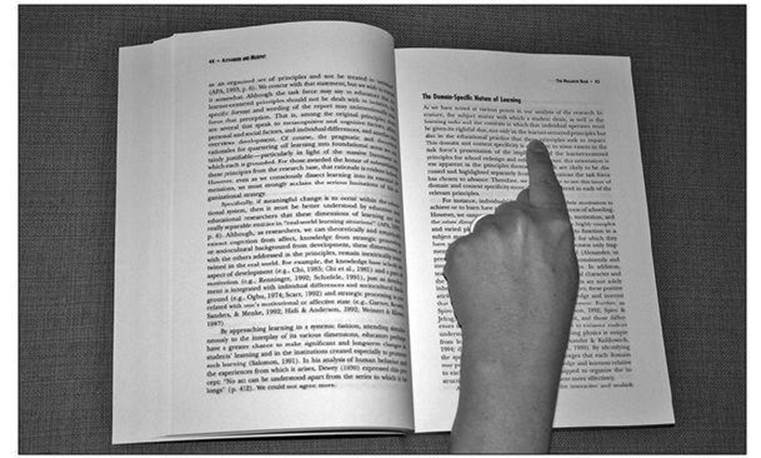
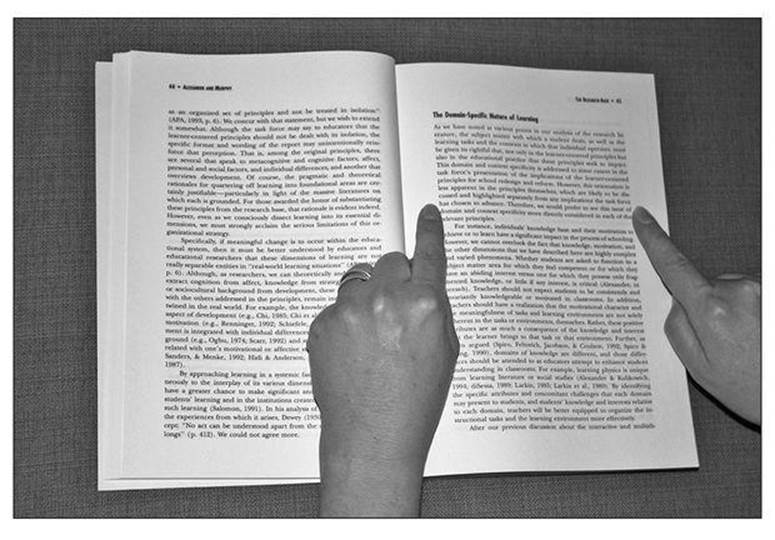
Left Pointer Pull is a great method for keeping your place and for encouraging your eyes to complete their journey accurately back to the beginning of the next line.
Here’s how to do it:
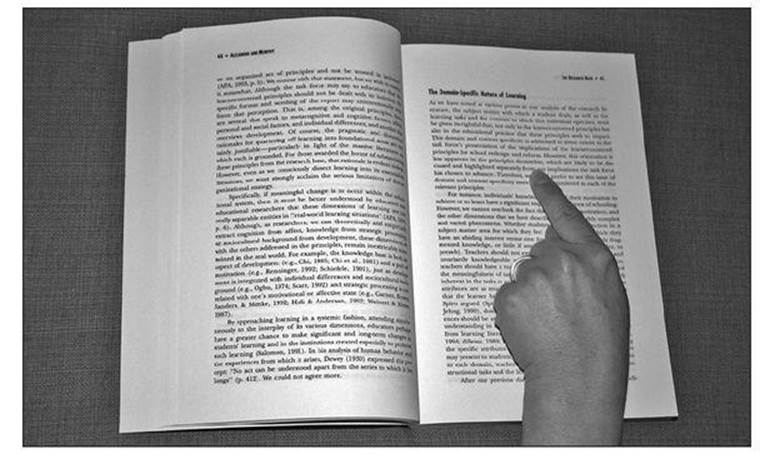
1. Start by pointing the index finger of either hand and curling in your remaining fingers. (Like you’re giving the “We’re number 1!” sign.)
2. Place your pointer finger on the left margin of the first line of text.
3. Start reading, moving your eyes to the right, and slowly move your left pointer finger down the left margin to the next line as your eyes approach the end of the first line.
4. Continue moving your pointer down the left margin. Encourage your eyes to move faster across the lines to meet your finger at the beginning of the next line.
Speed Secret
Next to the name of each pacer method is N, W, or B. This indicates that a method is best suited for either Narrow columns, Wide columns, or Both.
Starting finger position for the Left Pointer Pull.
Right Pointer Pull (B)
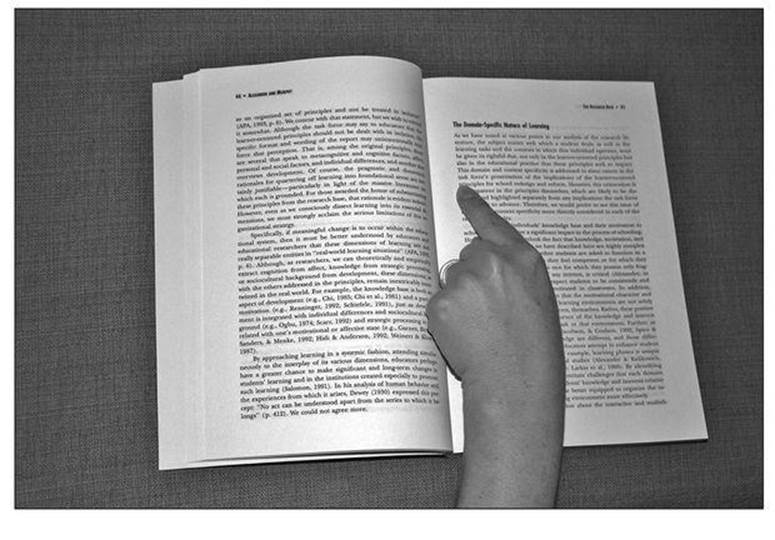
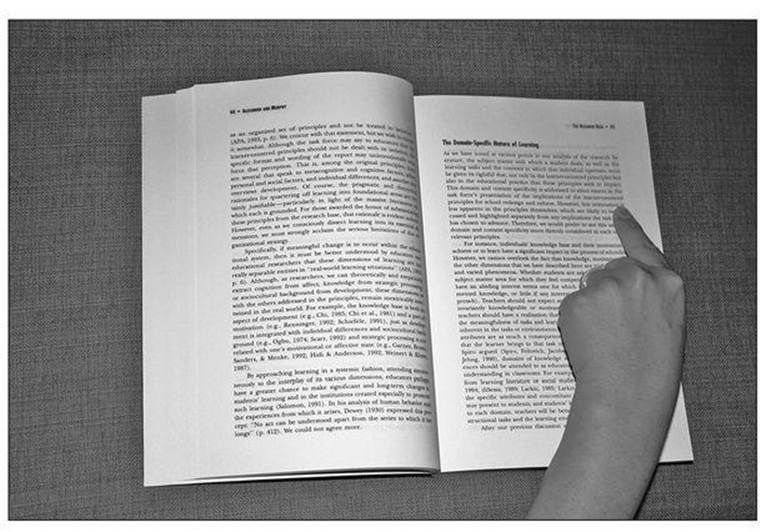
Right Pointer Pull is the exact opposite of the Left Pointer Pull. Instead of placing your pointer finger at the beginning of the line, on the left margin, you place it at the right margin. You read to your finger now instead of from your finger as before.
Here’s how to do it:
1. Start by pointing the index finger of either hand and curling in your remaining fingers.
2. Place your pointer finger on the right margin of the first line of text.
3. Start reading, moving your eyes to the right, and slowly move your right pointer finger down the right margin to the next line after your eyes reach the end of the line.
4. Continue moving your pointer down the right margin. Encourage your eyes to move faster across the lines to meet your finger at the end of the line.
Starting finger position for the Right Pointer Pull.
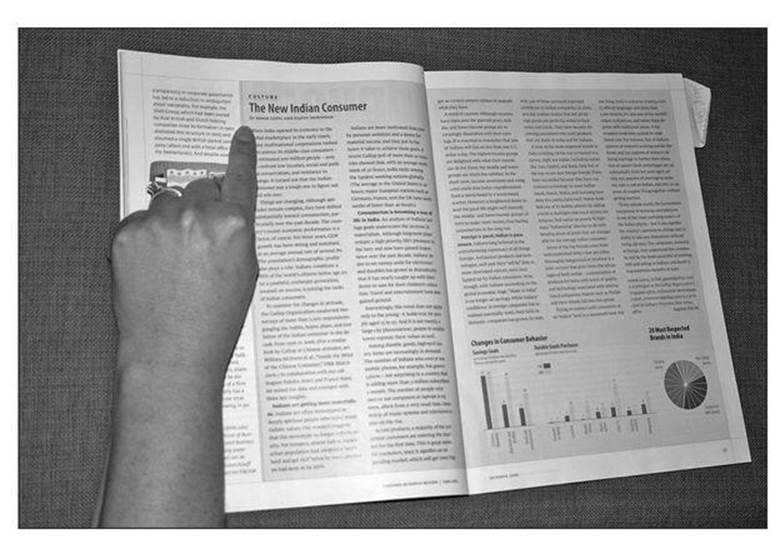
Center Pointer Pull (N)
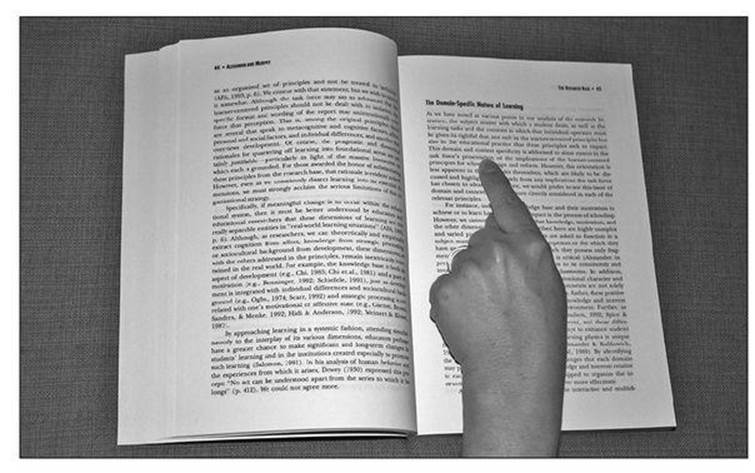
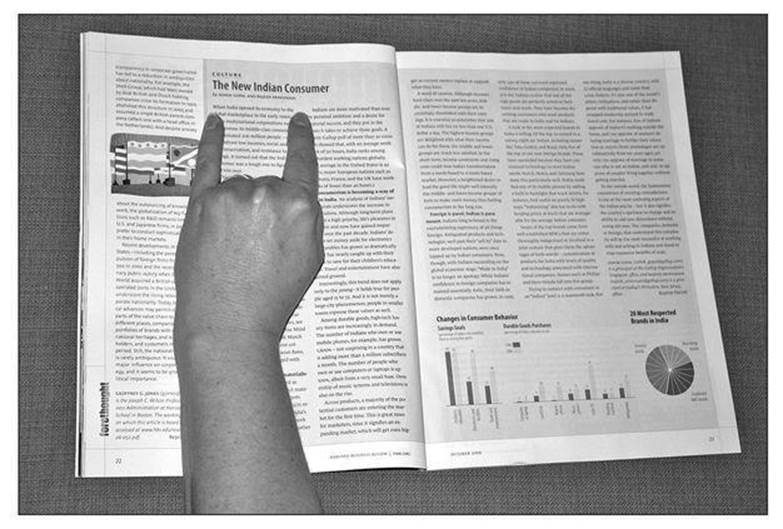
Center Pointer Pull is one of the best methods for narrow newspaper or magazine columns. It’s used to help keep your place and pull your eyes down the text.
Here’s how to do it:
1. Start by pointing the index finger of either hand and curling in your remaining fingers.
2. Place your pointer finger in the center of the column under the first line of text.
3. Start reading, moving your eyes to the right, and slowly move your pointer finger down the center as your eyes move left to right.
4. Continue moving your pointer down the center of the column. Encourage your eyes to move faster across the lines.
Speed Tip
When you have a little experience with Center Pointer Pull, try placing your hand a few lines below the line you’re on to encourage you to spread your peripheral vision.
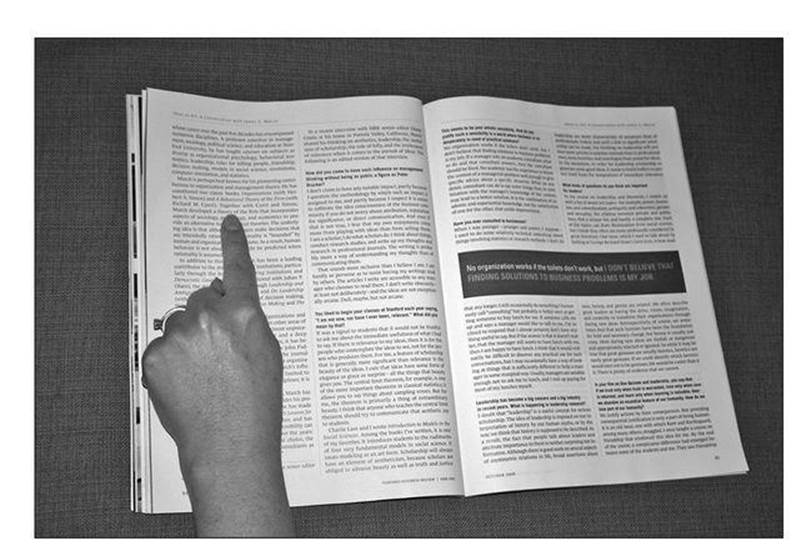
Starting finger position for the Center Pointer Pull.
Z Pattern (N)
The Z Pattern method and the S Pattern method that follows are the slowest of all the pacers, but are still good for guiding your eyes and keeping your place. Try this or the S on a newspaper or magazine with narrow columns.
Here’s how to do it:
1. Start by pointing the index finger of either hand and curling in your remaining fingers.
2. Place your pointer finger on the left margin of the first line of text.
3. Move your finger across and under the first line you’re reading.
Starting point of the Z Pattern pacer.
Your finger starts to draw the letter Z by moving your hand across the first line of text.

4. When you reach the end of the first line, move your finger diagonally down and back to the beginning of a line a few lines down to draw the middle part of the letter Z. As your hand draws back here, you move your eyes back and forth across the lines as quickly as you can to meet with your finger at the beginning of the line it lands on.
Continue drawing the letter Z by moving your finger diagonally down a few lines back to the left margin.
5. Move your finger across and under the line you’re on to make the Z complete.
Finish your Z by moving your hand across the line of text you’re on.
Continue with steps 3, 4, and 5 until you’re done with your reading or don’t need your pacer anymore.
S Pattern (N)
The S Pattern pacer is similar to Z Pattern, but in it you use rounded curves to move your hand. You can use S Pattern for detailed reading, although many use it for skimming.
Here’s how to do it:
1. Start by pointing the index finger of either hand and curling in your remaining fingers.
2. Place your finger in the middle of the first line of text.
3. Move your finger across the line and then down in a curve shape to eventually return to the beginning of another line a few lines down. This is not meant to underline every line; it’s meant to pull your eyes down and back across a few lines at a time.
4. Continue moving your finger in an S Pattern, allowing your eyes to follow it.
Speed Tip
If you want, you can use an unsharpened pencil, a pen (with the cap on), or a highlighter instead of your finger. This is especially useful if you are taking notes or highlighting while you’re reading.
Continue with steps 3 and 4 until you’re done with your reading or don’t need your pacer anymore.
Move your finger in a curve-shape pattern down a few lines.
Continue to move your finger in an S curve-shape pattern down a few more lines.
Staying close to the center, continue moving your finger in an S curve-shape pattern.
Multiple Finger Methods
Using a multiple finger method gives you more control over your reading. You get to decide how many words to focus on at one time and how quickly you move through the text. These are the multiple finger methods we’ll look at in the following sections:
• Long-Smooth Underline (W)
• Short-Smooth Underline (W)
• Double Pointer Pull (B, especially W)
• The Vulcan (N and some W)
• Point-to-Point (B)
• Open Hand Wiggle (B)
Try each one on your own material and on a 1-minute timing to see which one(s) work best for you.
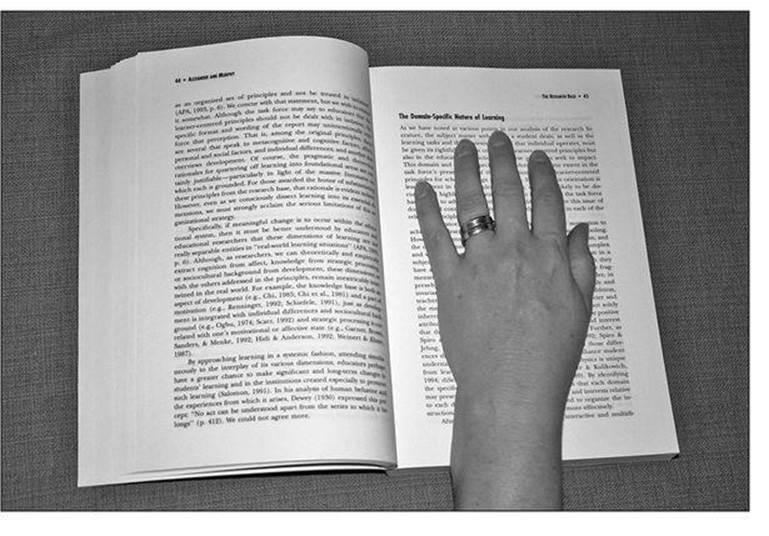
Long-Smooth Underline (W)
Wide columns are more challenging to read because of the distance your eyes travel across the lines and the long jump back to the beginning of the next line. Try Long-Smooth Underline to make wide-column reading easier.
Here’s how to do it:
1. Using your index finger, middle finger, and ring finger, point your fingers, pulling back your middle finger so it’s equal in length to other two fingers. Curl your thumb and pinky comfortably inside your palm.
2. Rest your forearm on a desk or table, and place the reading material under your hand.
3. Place your three fingers at the beginning of the line under the line of text you’re starting on, and follow your fingers across the line to the end. Quickly move your hand back to the beginning of the next line. You’re not reading (stopping your eyes) on the return, so your hand should be moving very quickly here.
4. Continue moving your three fingers back and forth under the lines as quickly as you can, reading the text as you proceed. Although it might feel somewhat frantic, know that you are in control.
Finger position and starting point for the Long-Smooth Underline.

Movement across the line using the Long-Smooth Underline.
To help this become a very quick movement back and forth, let your forearm move your hand. If you don’t, you may find your hand getting tired too soon.

Speed Tip
When using Long-Smooth Underline as a pacer, let your fingers pull your eyes along. You should sense that your eyes are being pulled along by your hand.
Short-Smooth Underline (W)
Short-Smooth Underline is similar to Long-Smooth Underline in that they both move quickly across the lines. The difference is how far across they go.
Here’s how to do it:
1. Using your index finger, middle finger, and ring finger, point your fingers, pulling back your middle finger so it’s equal in length to other two fingers. Curl your thumb and pinky comfortably inside your palm.
2. Rest your forearm on a desk or table, and place the reading material under your hand.
3. Place your three fingers about ¼ of the way across the line under the line of text you’re starting on, and follow your fingers across the line, stopping about ¼ of the way from the end of the line. Move your hand back to the ¼ indent of the next line.
In effect, you are only underlining the middle ½ of the line and your eyes are stretching left and right to read peripherally what you aren’t underlining with your fingers.
Movement across the line, stopping about ¼ from the end of the line.
4. Continue moving your three fingers back and forth under the middle ½ of the text as quickly as you can.
Although your pace will feel a bit slower than when using Long-Smooth Underline, you may still feel somewhat frantic because you’re taking in more words.

Speed Bump
If you go too slowly with either Long-Smooth Underline or Short-Smooth Underline, you’ll tempt yourself to point to each word, which will slow you down big time. For the best results, keep your hand moving.
Double Pointer Pull (B, W)
Double Pointer Pull encourages a quick left-to-right eye movement going from one fingertip to the other. It helps you focus on pages with a lot of words and especially on pages with wide columns.
Here’s how to do it:
1. Point your index fingers out from each hand, curling your remaining fingers in toward your palms with your thumbs tucked around your middle fingers.
2. Place your left pointer finger at the left margin of the line you’re reading, and place your right pointer finger at the right margin of the same line.
Starting finger position and location for the Double Pointer Pull.
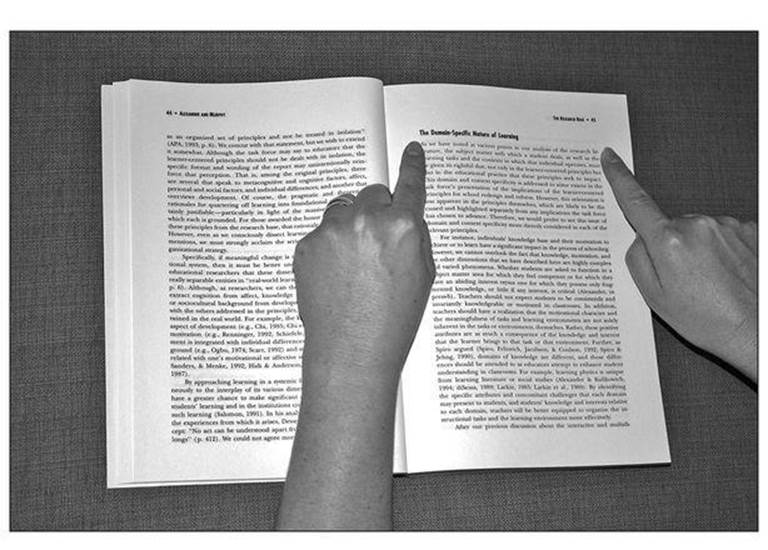
3. Move your eyes from the left to the right while you pull your fingers down the page, line by line. If you go fast enough, you’ll feel as if your eyes are bouncing from fingertip to fingertip.
Fingers continue down the left and right margins while the eyes move left and right in Double Pointer Pull.
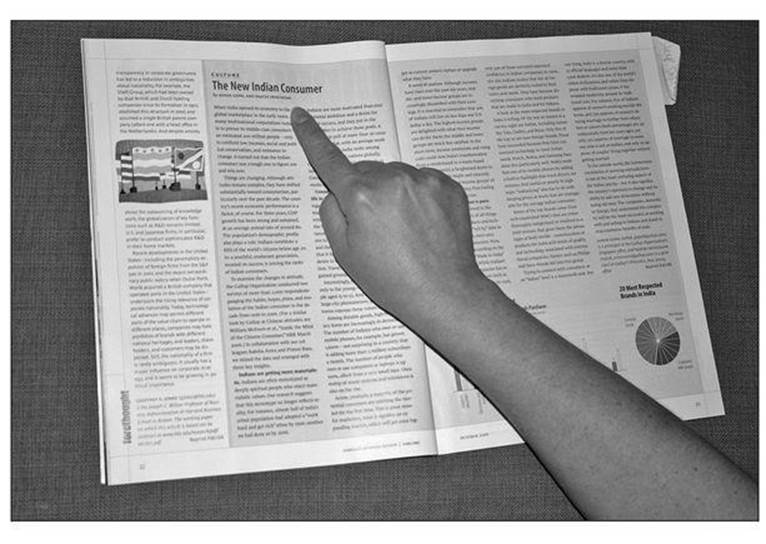
The Vulcan (N, and Some W)
I have dubbed this method the Vulcan because your hand looks like the hand position Vulcans used on Star Trek. It’s not one I’ve seen mentioned in other books, but it is a method I’ve seen people use creatively and effectively, without formal instruction. Here’s how to do it:
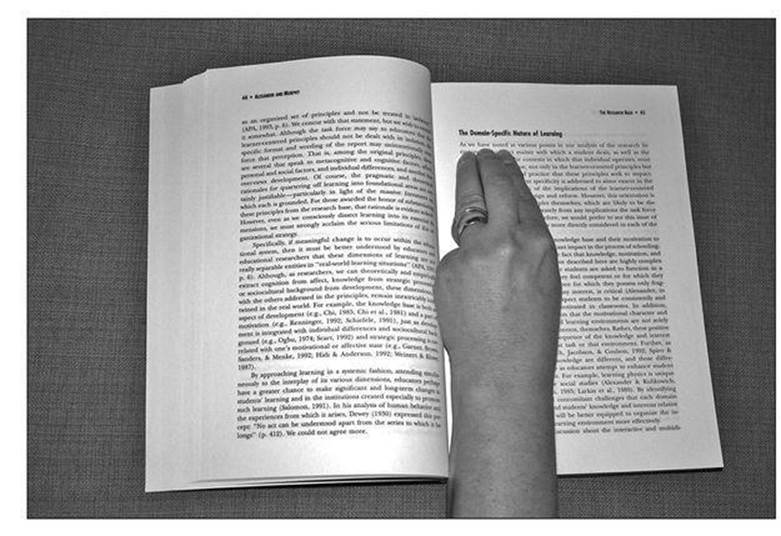
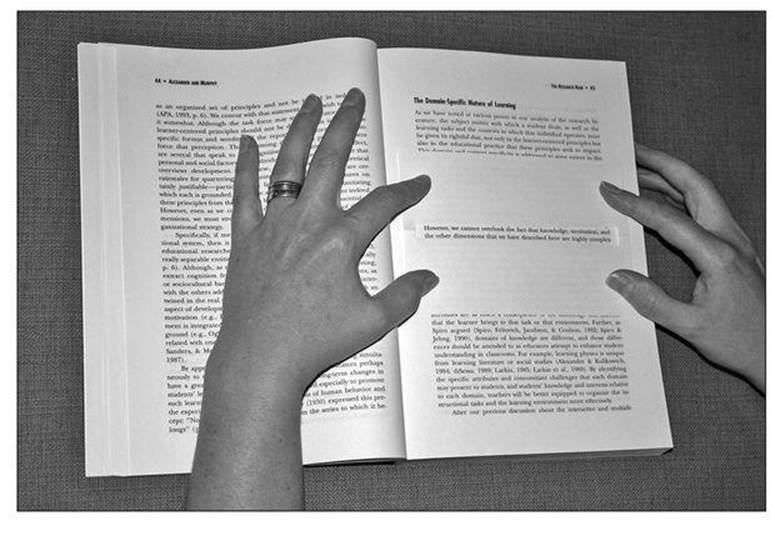
1. With your left hand closed in a fist, point your pinky and pointer (index) fingers only.
2. Place your pinky finger at the beginning of the first word on the left margin and your pointer finger at the end of the same line. You might need to adjust your hand position to get your fingers to line up evenly. (If you prefer to use your right hand, place your pointer finger at the beginning of the first word of the line and your pinky finger at the end of the same line.)
Finger position and starting point for the Vulcan.
3. Pull your fingers straight down as you move your eyes quickly left to right.
Point-to-Point (B)
Point-to-Point is a more active version of the Vulcan. You can use it on both size columns and to help you establish a reading rhythm.
Speed Tip
Be careful of your line lengths: if too wide, your fingers will be spread too wide, making it uncomfortable to read for any length of time. In this case, you can use Point-to-Point (see the following section).
Here’s how to do it:
1. With your left hand closed in a fist, point your pinky and pointer (index) fingers only.
2. Touch your pinky fingertip on a word about ⅓ of the way in from the left margin. Your pointer fingertip should be hanging in the air, waiting for its job, which will be to touch a word about ⅓ from the end of the line. When your pointer touches down, raise up your pinky finger. (If you use your right hand, touch your pointer finger about ⅓ in from the left margin. Your pinky should be hanging in the air. Then touch your pinky fingertip about ⅓ from the end of the line.)
3. Read with your eyes going across the lines touching the left part of the line and then the right part, creating a tennis match-like rhythm.
Open Hand Wiggle (B)
I like to use Open Hand Wiggle on a Sunday newspaper when there’s a lot I want to read and I don’t have all day to read it. The only downside, if I dare call it that, is that my fingers get black from the newsprint. Nothing soap and water can’t fix!
Here’s how to do it:
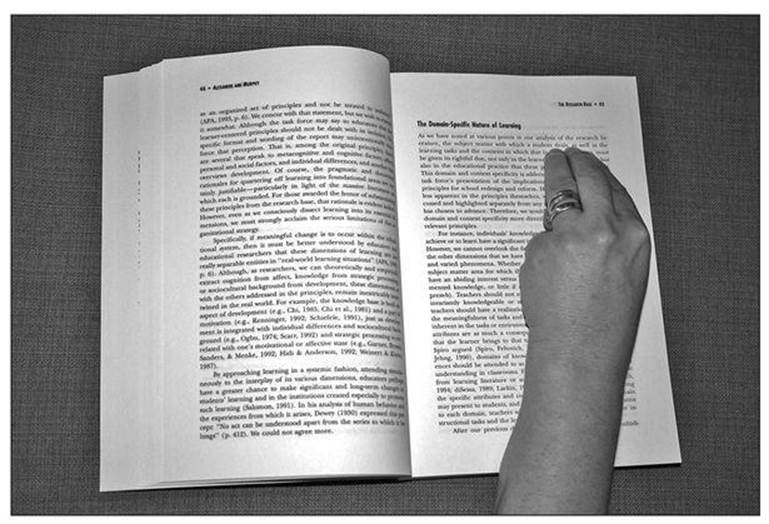
1. Open either hand with your fingers comfortably extending outward with space between your fingers.
2. Lay your hand with your middle finger approximately in the center of the column. In effect, your middle finger will be guiding you because it’s the longest finger.
Finger position and starting point for Open Hand Wiggle.
3. Wiggle your hand back and forth in an S-type motion, pulling your hand quickly down the page while your eyes read left to right. It may help to act as if you’re dusting or erasing the words on the page.
Card Methods
As an alternative to reading with your hands, you can use a blank white card to speed up your reading. White (or colored) index cards without lines or the back side of a business card all work well. If the card contains writing, your eyes will be distracted, so blank is better.
Here are the card methods we’ll look at:
• Blank Card (B)
• White Card Cutout (B)
Blank Card
Many people really like this method because the card’s straight edge is easy to follow and they don’t have to be concerned with how they’re moving their fingers.
Speed Secret
Use different size blank cards depending on the column width: use a 3×5 or business card size for narrow columns, or tape two smaller cards together for wider columns. You can also use 4×8 or 5×8 blank cards.
Here’s how to do it:
1. Place your white card on top of or over the line you’re reading. Adjust the width of the card to match the width of the column.
2. Move your eyes from left to right as you push the card down the page. The straight edge helps you develop smooth eye movements across the lines.

Speed Bump
Do not place your blank card under the line you’re reading. This encourages you to go back over the material, double-checking your comprehension and not trusting your brain. It also blocks the upcoming words you’re yet to read. It’s best to place the card on top, which reduces the temptation to go back and pushes you to read the text in front of you that your eyes are eager to read.
White card position and starting point for the Blank Card Method.
White Card Cutout (B)
I don’t see many people using this method, but the people who do use it tell me about their success with it. Try it—you might like it!
Here’s how to do it:
1. Have a few sizes of blank cards available or use a regular piece of blank white paper. Choose your reading material and notice the column width.
2. Fold your card or paper in half and lay the folded edge under the first line of the column. Make one pencil mark on the card where the text begins on the left and one where the text ends at the end of the column on the right.
3. Starting at one pencil point, cut the card away from the fold about the height of one line of text. Make a matching cut up on the other pencil mark. Now make a parallel cut to the fold going across to the other cut. When you open your card, you should have a window the width of the column and a few lines high.
4. Place your cutout card over your text, exposing the first few lines of text. The first line should be at the top margin of your card.
5. Move your card down as quickly as you can while moving your eyes left to right. Your eyes will have to focus on the exposed lines only. This might prove less distracting because you can’t see the other words on the page.
Sample card cutout placed on the page.
Fast Page Turning
While you’re learning to speed read, it also helps to learn how to turn pages quickly because your speed can sometimes be limited to how fast you can turn the pages. Right-handed readers have a little more to learn, while left-handed readers will find this easily doable.
If you’re reading a new book or magazine, you might want to relax the spine so the pages lay flat before you begin reading. Starting from the front of the book, run your fingers up and down the spine, pressing into the book every few pages to relax the spine.
Here’s a quick process for how to turn more pages in less time:
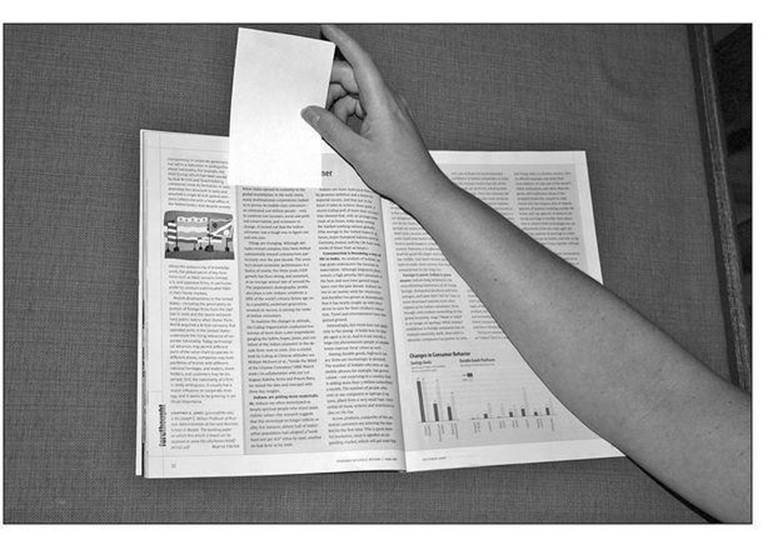
For right-handed readers:
1. Grasp the top-right-side page of the material with your left hand. Curl your arm up and around the book at the top so your arm is above the material, and create a straight line of sorts from your elbow to your wrist.
2. Start reading quickly with your pacer. With your left hand, simultaneously grasp the next page in preparation for turning.
3. When your eyes approach the bottom of the right page and you’re ready for the next page, use your left hand to turn the page and resume its place at the top of the material.

Speed Bump
Relax a book’s spine just enough to lay the book flat for use with any of these methods. If you force it too much, you might break the spine, which wouldn’t be good if you borrowed it from a friend or the library.
Arm and hand fast page-turning position for right-handed readers.

For left-handed readers:
1. Position your right hand at either the top or the bottom of the right page.
2. Start reading with your left hand.
3. When you approach the bottom of the right page, use your right hand to quickly turn the page.
And the Results Are …
Throughout this chapter you were introduced to many possible options for speeding up your reading. You probably liked some more than others, and that’s fine. The idea is to find the one(s) that works best for you. An easy way to know which might be suited to you is by timing yourself using the pacers.
One-Minute Timing
If you haven’t already done a One-Minute Timing, now is the time! If you’re really serious about trying them all, you can conduct a One-Minute Timing using each of the pacers, or just a few as your time and interest allow. The longest it would take is 15 minutes—13 minutes to time yourself and 2 minutes to document your results. Here you’re looking more for speed than comprehension; you’ll evaluate your comprehension in subsequent exercises.
Turn to Appendix B for the One-Minute Timing instructions and Appendix C for your progress chart.
3-2-1 Drill
You can also practice with the 3-2-1 Drill. This really challenges you to read quicker and get your eyes and brain to start communicating better and faster. It goes like this:
1. Choose any reading in Appendix B. Time yourself reading for 3 minutes with a pacer of your choice. Concentrate on comprehension.
2. When your time is up, mark the line you’re on. How far did you go?
3. Write down the key comprehension points you remember on a separate piece of paper, without referring back to the reading.
4. Next, time yourself for 2 minutes reading the same material and stopping at the same place you stopped in 3 minutes. You’ll have to speed up your reading! Add more key points after you’re done reading.
5. To really challenge yourself, read the same material for just 1 minute, stopping at the same place you did for the 3-minute timing. Add more key points.
Keep track of your results on the “3-2-1 Speed Drill Personal Progress Chart” in Appendix C.
The 3-2-1 Drill conditions your eyes to know what it feels like to move quickly across and down the lines and your brain to get used to seeing more words faster. It will start to familiarize your brain with the speed at which you wish to read and force it to grasp comprehension in a shorter period of time.
Speed Tip
To tally your words per minute, multiply the number of lines you read in the article by the average number of words per line (noted at the beginning of each reading).
The Least You Need to Know
• Adding your hands or a pacer card to your reading helps you read faster, keep your place, and concentrate better.
• Being aware of the column width is important for choosing which pacer strategy is best.
• There are two kinds of hand methods: single finger and multiple finger; each have at least five variations for you to choose from.
• One of the two card methods might help you increase your reading speed.
• Your speed may be limited by how fast you can turn pages. Learn to turn them faster, and you will read faster.