Classic Human Anatomy in Motion: The Artist's Guide to the Dynamics of Figure Drawing (2015)
Chapter 10
Gesture and Action Drawing
One of the most exhilarating ways to study the human figure is to sketch the figure in a rapid fashion. This process is known by several names—gesture drawing, action studies, warm-ups, quick studies, and croquis (pron., crow-kee). While gesture drawing is only one of countless approaches to figure drawing, many artists consider it the most expressive and spontaneous. It’s enormous fun to capture a pose in just a few seconds or minutes, with only a few strokes on the paper.
Gesture drawing also helps build and maintain skill. Figurative artists across disciplines find that doing gesture studies loosens them up, keeps them in shape artistically, and sometimes triggers artistic ideas. Drawing quickly from a model is a terrific way to improve your line quality and your ability to convey dynamic movement. Especially in the shorter poses, it can also help you “edit out” any inessential details. For an artist, gesture drawing is akin to an athlete, dancer, or musician’s warming up before a performance. Just like athletes and performers, artists need to warm up regularly and practice often, preferably on a daily basis.
The best way to practice gesture drawing is to draw from a live model in a studio setting. It’s electrifying to try to capture the dynamic quality of a pose before the model changes to the next pose. Although you can certainly practice from photographs, nothing beats the high-octane atmosphere produced by a live model creating unexpected and challenging poses on the spot.
Most figure drawing classes incorporate gesture drawing as an important exercise. Teachers know that students who have warmed up with gesture drawing will produce more focused and creative drawings during the rest of the class session. Likewise, in figure drawing workshops that are open to the public, models usually start out with briefer action poses before going into the longer poses.
GESTURE STUDY OF THREE FIGURES DANCING
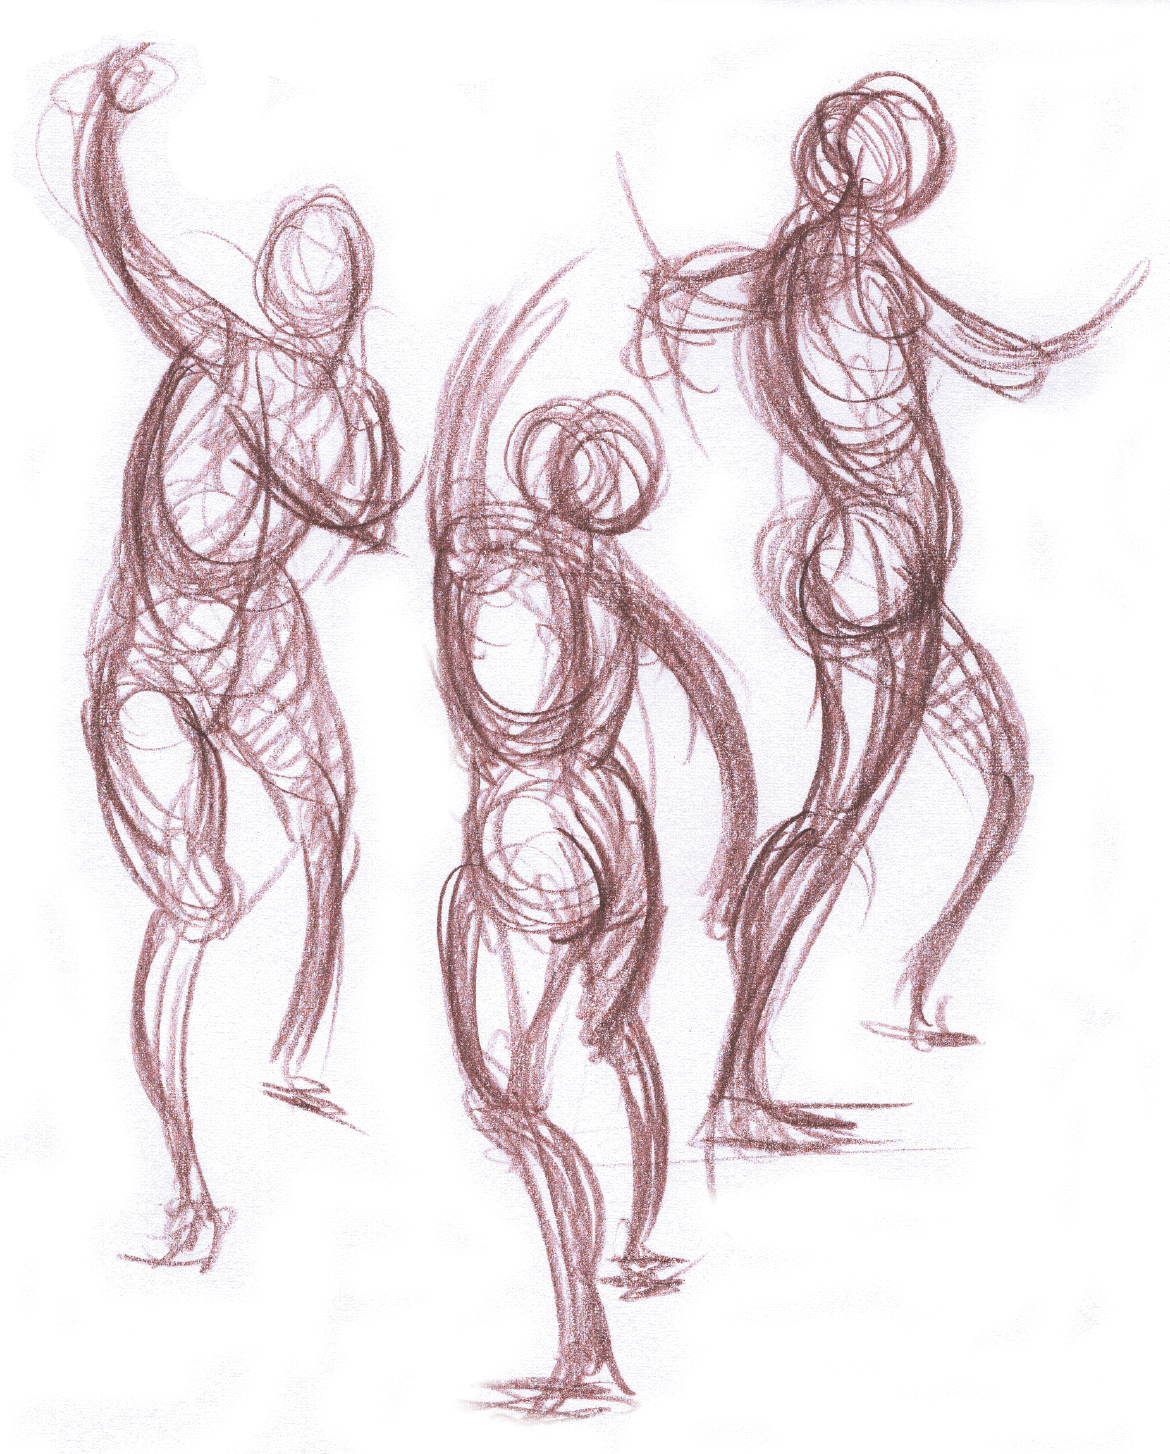
Colored pencil on white paper.
If you can’t get to a figure drawing class or workshop but want to practice from real people, sketching people in everyday situations—in museums, parks, shopping malls, cafés—can also be a great way to practice. People who are unaware that you are drawing them tend to act in a more natural way than professional models, whose poses are more dramatic or calculated.
One of the best things about gesture drawing is that it makes you give up any expectation of doing a “perfect” drawing. The focus is on capturing the essence of a pose without getting bogged down in details, and gesture drawing temporarily frees you from concerns about proportions and anatomical accuracy and from trying to create the illusion of three-dimensional form. Artists need to know that it is okay to let go at times, slam-dunking a drawing without judging their own skills. Critical self-evaluation can often sabotage your drawings, so it’s good to get rid of preconceived notions of what a drawing should or should not be and just have a great time sketching your heart out.
Another block that artists sometimes suffer comes from feeling that they have to be in the “right mood” to draw, or that they have to wait until they feel inspired or motivated. But moods that interfere with your art need to be bulldozed, and one of the best ways to do this is to practice gesture drawings even if you are not feeling up for it. If you’re feeling bored or angry about something, channel the mood into the drawing without worrying about the outcome. Even doing a few sketchbook drawings a day can keep you from getting creatively blocked and help you stay connected with your art.
Gesture drawing can also be applied to drawing from memory or imagination. A doodle might turn into a torso, and before you know it, a figure will materialize from a few raw strokes. You can also visualize a pose in your mind and flesh it out rapidly on paper without worrying about accuracies of anatomy or proportion. Remember, these are meant to be enjoyable exercises. No one else ever has to see your gesture studies, so there’s no need to worry about what others may think of your drawing skill. On the other hand, if you feel comfortable doing so, you might share your sketchbook studies with artist friends. They will usually be very supportive. If not, then it might be time to get some new artist friends.
There are many ways to do gesture drawings, several of which are explored in this chapter. No one method is the “right” way. Artistic experimentation calls for a variety of techniques and tools, and having an open attitude toward different methods will increase your creative possibilities. Eventually, you will find your own favorite methods and tools for drawing gestures.
GESTURE STUDY OF A STANDING BACK VIEW
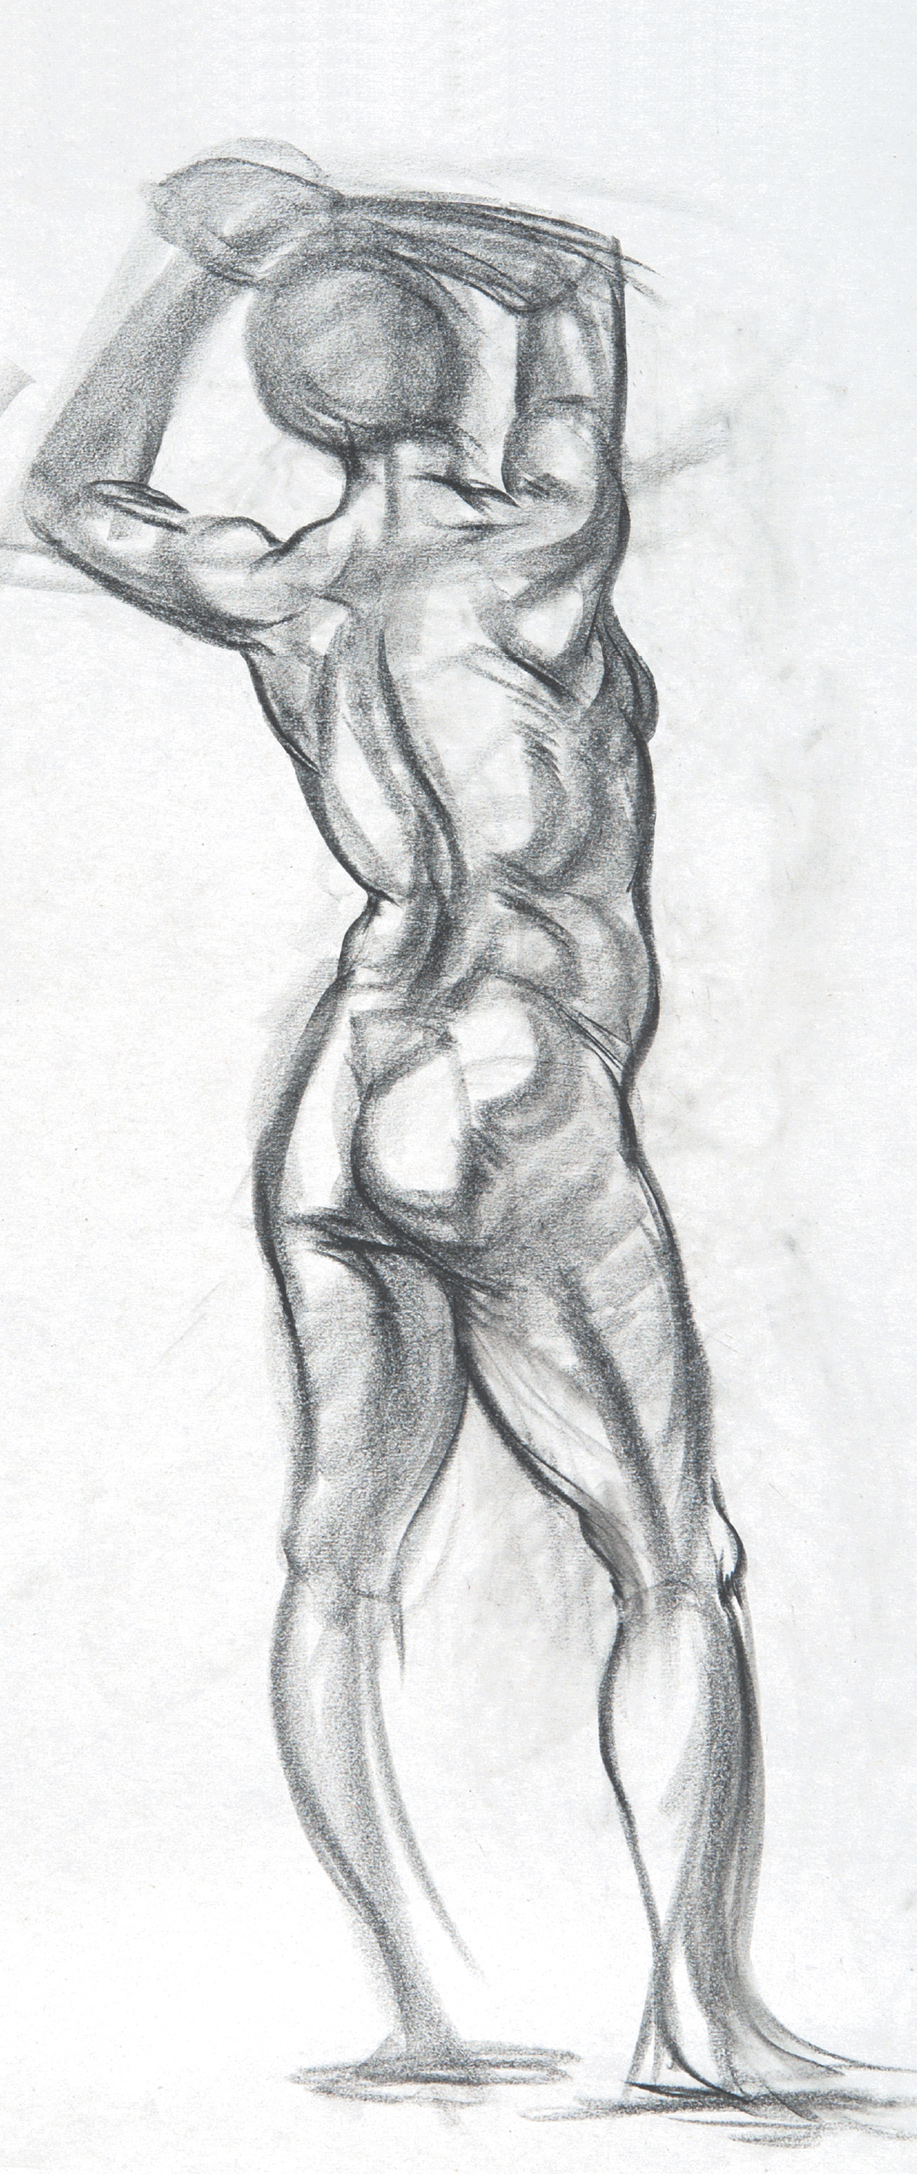
Black Conté crayon on newsprint.
Method #1: The Stick Figure Approach
Poses of 15 to 30 seconds
People have been drawing stick figures ever since Paleolithic times, and most children instinctively use this approach when drawing people. For figurative artists who need to indicate the action of the whole figure in just a few seconds, this rudimentary method works well.
When drawing a pose very quickly, indicate the limbs, spinal column, hips, and shoulder angle as single lines, using simple circles or block shapes for the head, rib cage, and pelvis. Check the joints at the shoulders, elbows, hips, and knees to quickly show how the limbs are tilting in different directions within the pose. Even though this is an extremely primitive approach to drawing the figure, it can rapidly document an action pose.
SKETCHBOOK STUDY OF ACTION POSES
Stick figure approach
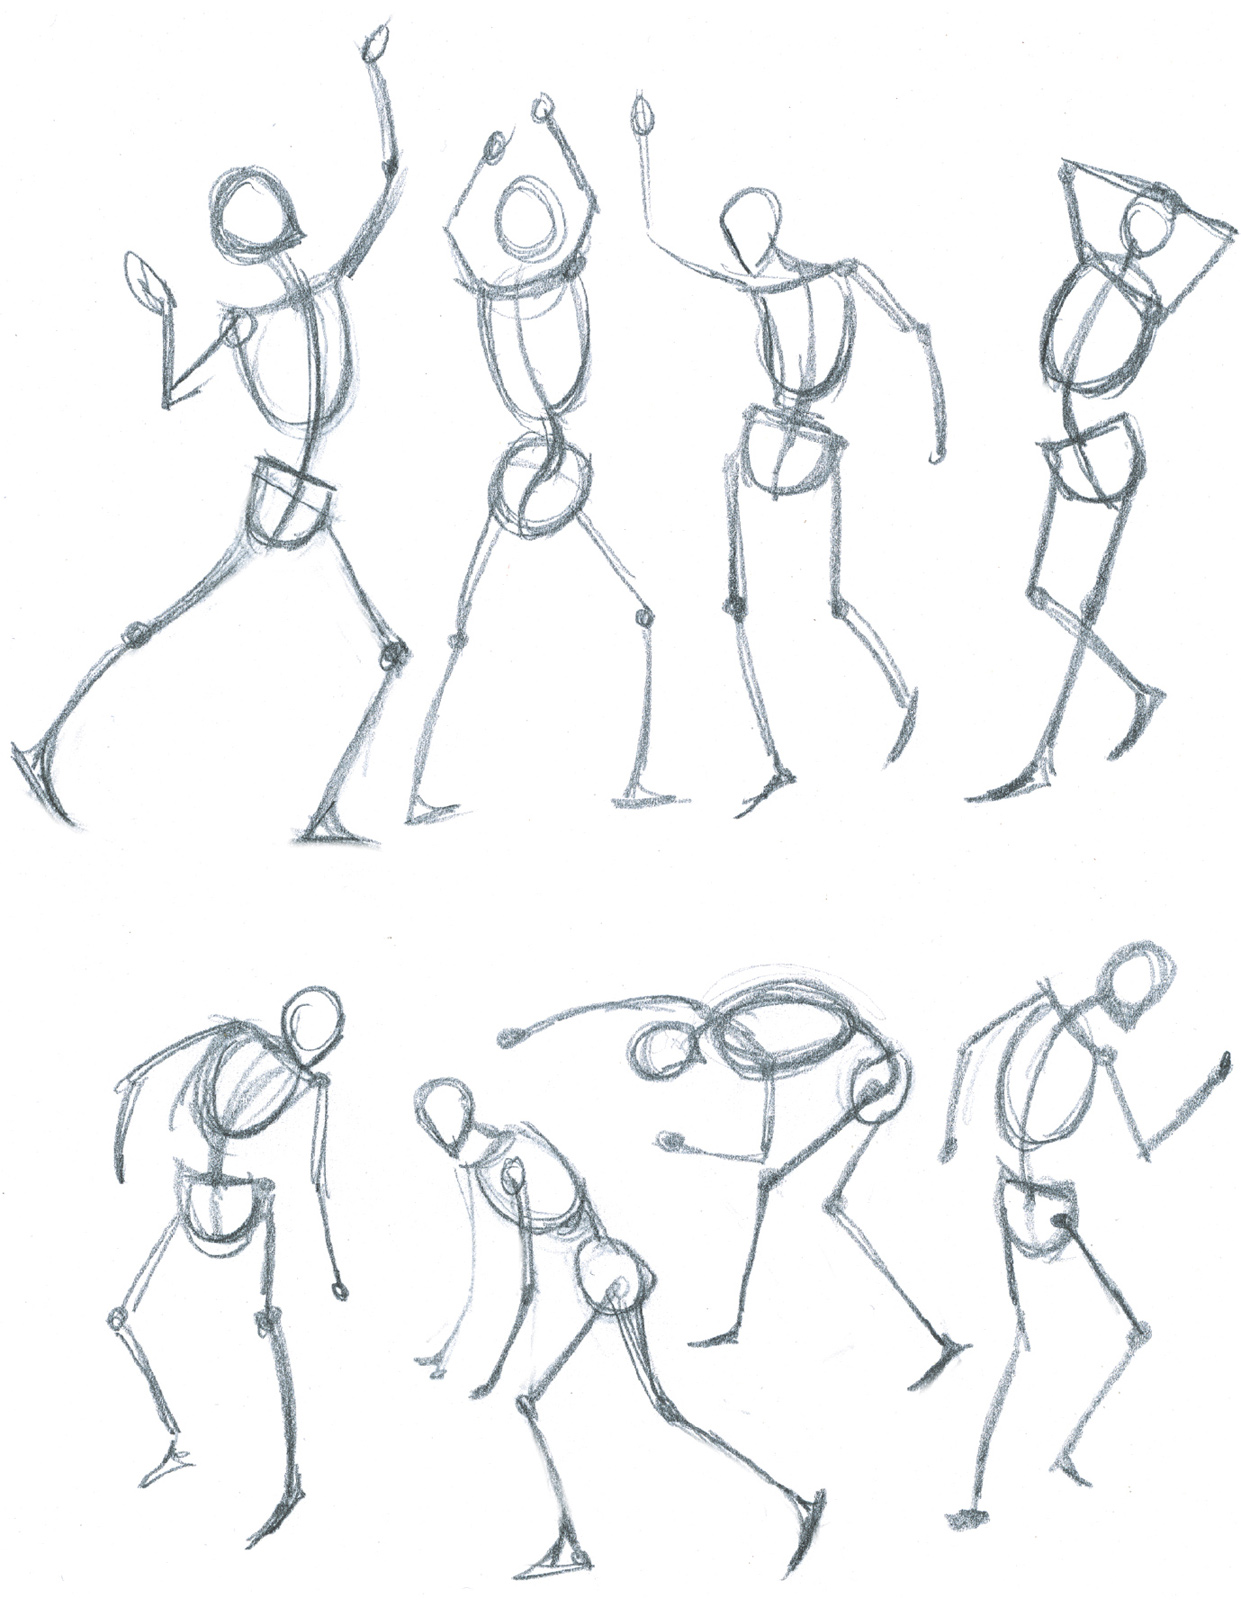
Graphite pencil on white paper.
Method #2: The Silhouette Approach
Poses of 30 seconds to 1 minute
Another way of getting the whole pose on paper in a very limited amount of time is to draw the figure as a simple two-dimensional silhouette. When drawing the pure shape of the pose without any detail, you’ll be aware of the tilts and angles of the body but will edit out any indication of three-dimensional form.
Broad-tipped drawing tools work well for this approach: chisel-tipped markers, brush-pens (pens with a soft, brushlike tip), vine charcoal sticks, pastel sticks, and broad graphite pencils are all good choices. Or you might use a brush loaded with ink or a diluted ink wash to capture the shapes of the figure in quick, broad strokes—or a chamois cloth dipped in pastel or charcoal dust.
A variation on this technique is to use pure, silhouetted shapes for some parts of the body while giving other parts a few highlights to give dimension to the forms. If you like, you might add a few lines once the basic shape is blocked in.
GESTURE STUDY OF FIVE FIGURES
Silhoutte approach
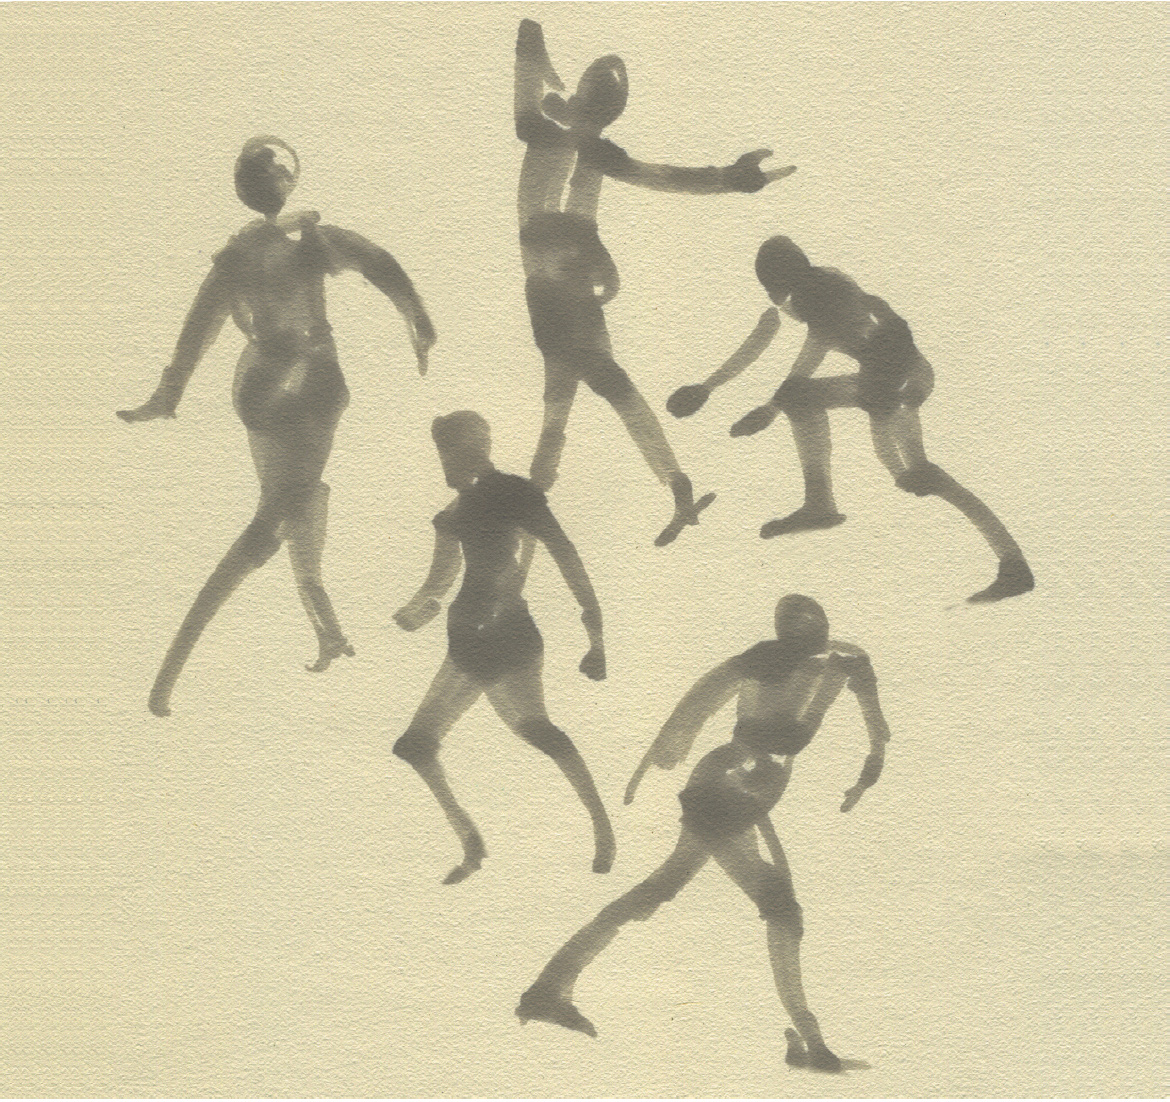
Gray chisel-tipped marker on cream-colored paper.
GESTURE STUDY OF TWO DANCERS
Silhoutte approach, with lines added
Black Conté crayon and brown pastel stick on newsprint.
Method #3: The Searching Line Approach
Poses of 30 seconds to 1 minute
The “searching line” approach captures the pose with multiple lines. You may use a series of organic, swirling lines, barely lifting the drawing tool from the paper, or apply angular strokes in a bold, aggressive fashion to mark obvious directional angles and tilts. Or you can combine both kinds of lines in the same drawing, depending on the pose and how you want to capture the action. As the method’s name implies, you are searching for the gesture of the pose.
This way of working is spontaneous, so don’t worry about proportion or anatomical accuracy. There is no time to even consider such things. You are simply capturing the pose in its purest essence with vitality and energy.
The searching line method is practical for extremely fast studies, such as 30-second to 1-minute poses. You can use any drawing tool you like, but ballpoint pens, graphite pencils, mechanical pencils, and waxy colored pencils that maintain somewhat sharp points work well for this approach, as do fine-tipped markers and brush-pens.
When using this technique, first find the main action of the pose and then flesh out the shape of the figure with multiple flowing lines or agitated strokes. The strokes themselves should be executed rapidly, because the pose is not held for very long.
Most artists start with the head shape and then quickly indicate the torso, followed by the direction of the limbs. There is usually too little time to suggest smaller forms such as hands or feet, except perhaps with small, rapid strokes. At first glance, drawings done in this style may appear to be just a bunch of unrelated scribbles, but if you examine them more closely, you will see the pose emerging from the heap of organic lines. This is part of the magic of this approach. It is extremely organic and visceral, and a lot of fun. There are no rules. Just trust your intuition and let the lines jab or flow.
GESTURE STUDIES OF FOUR FIGURES
Searching line approach
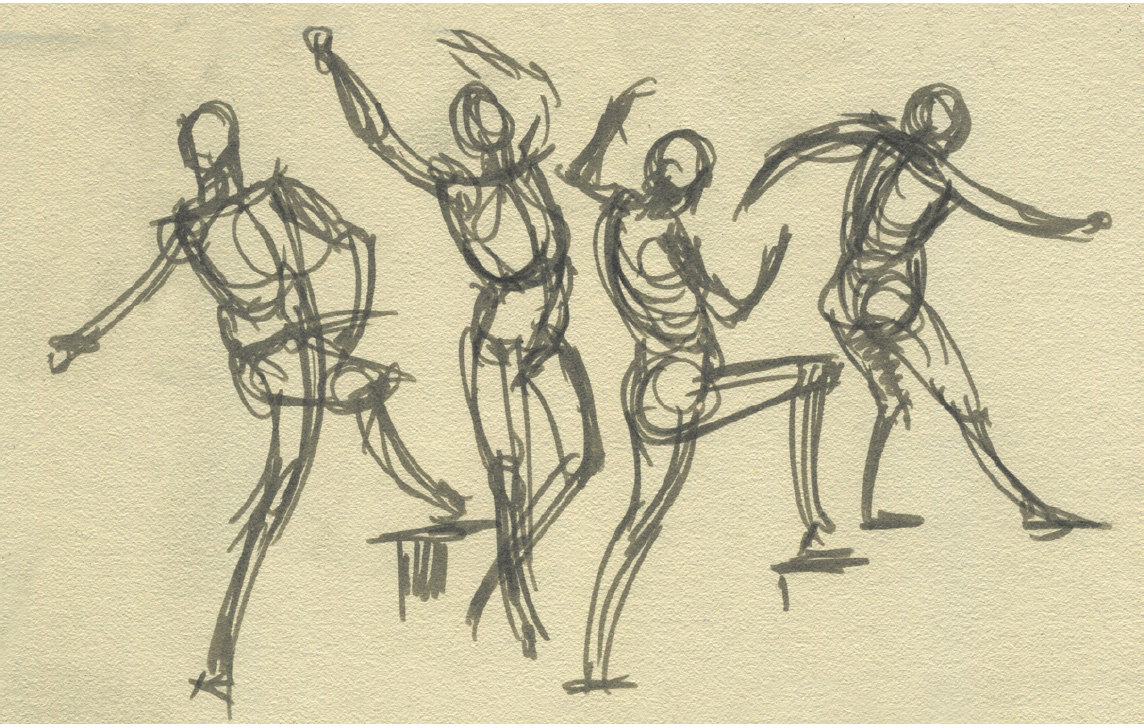
Gray brush-pen on cream colored paper.
GESTURE STUDY OF TWO FIGURES
Searching line approach
Colored pencil on white paper.
Method #4: The Organic Line Approach
Poses of 1 to 2 minutes
In the organic line approach to gesture drawing, you lay down your lines in a flowing, loose manner, but more selectively than in the searching line approach. If you wish, you can use different values (light and dark lines) to accentuate the rhythm of forms, to convey tension, or to show that forms are advancing or receding—though in a highly edited way. Very often, the lines in an organic-line gesture drawing have a calligraphic quality, changing from thick to thin or dark to light in a single stroke. You can also add tones to your drawing. Charcoal, Conté crayons, graphite pencils, and colored pencils are all suitable for this approach, as are calligraphy pens that can produce both thick and thin strokes.
The organic line approach is great for relatively short poses—1 to 2 minutes. When doing an organic line study, look for any interesting tilting or twisting action within the pose that you can exaggerate to create greater dynamic tension. You may emphasize certain anatomical forms, but draw them rapidly because of the time constraint.
GESTURE DRAWING OF A FIGURE IN A CONTRAPPOSTO POSE
Organic line approach
Black crayon on newsprint.
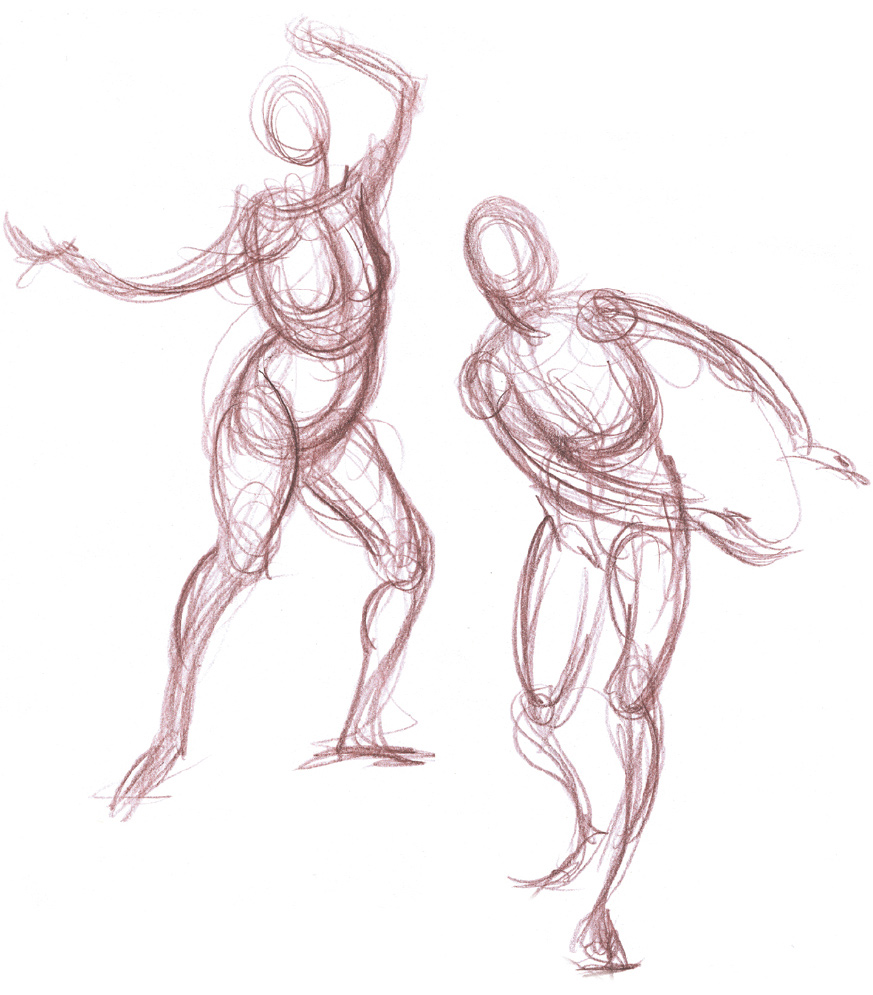
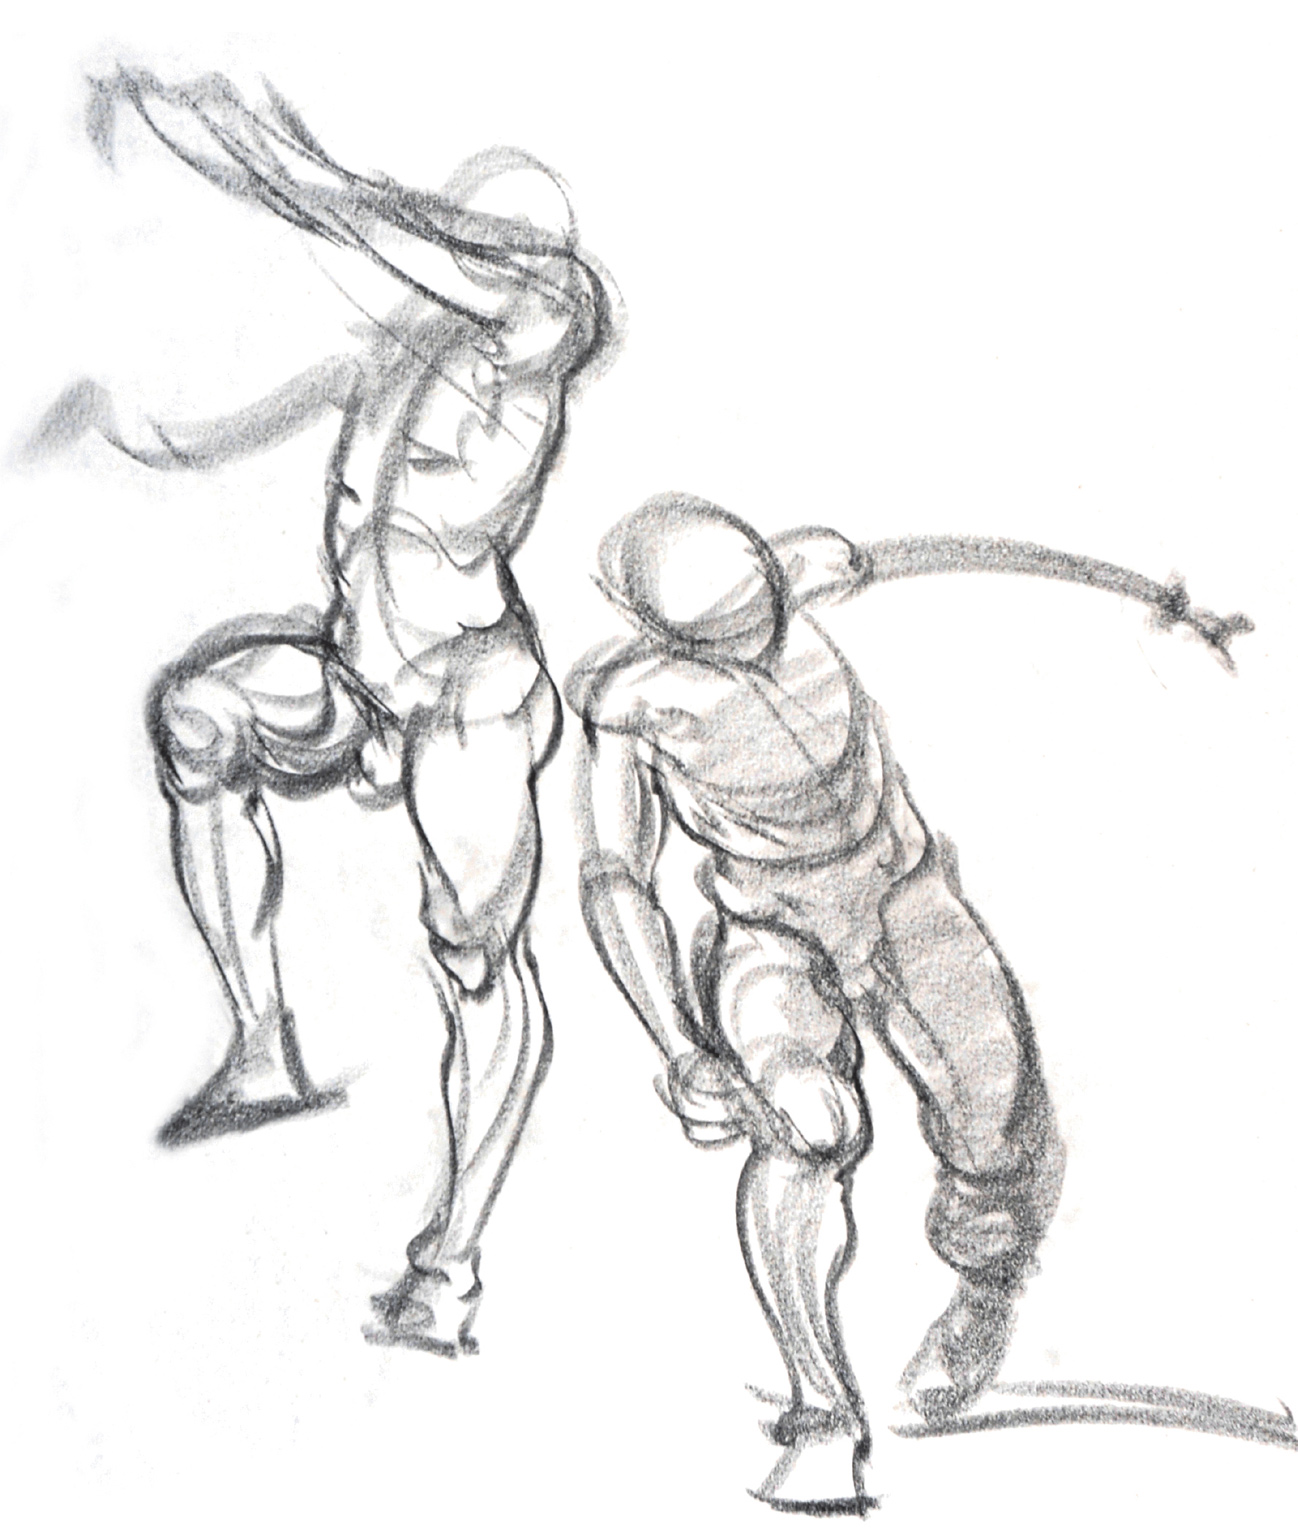
GESTURE STUDY OF TWO MALE FIGURES IN DANCE POSES
Organic line approach
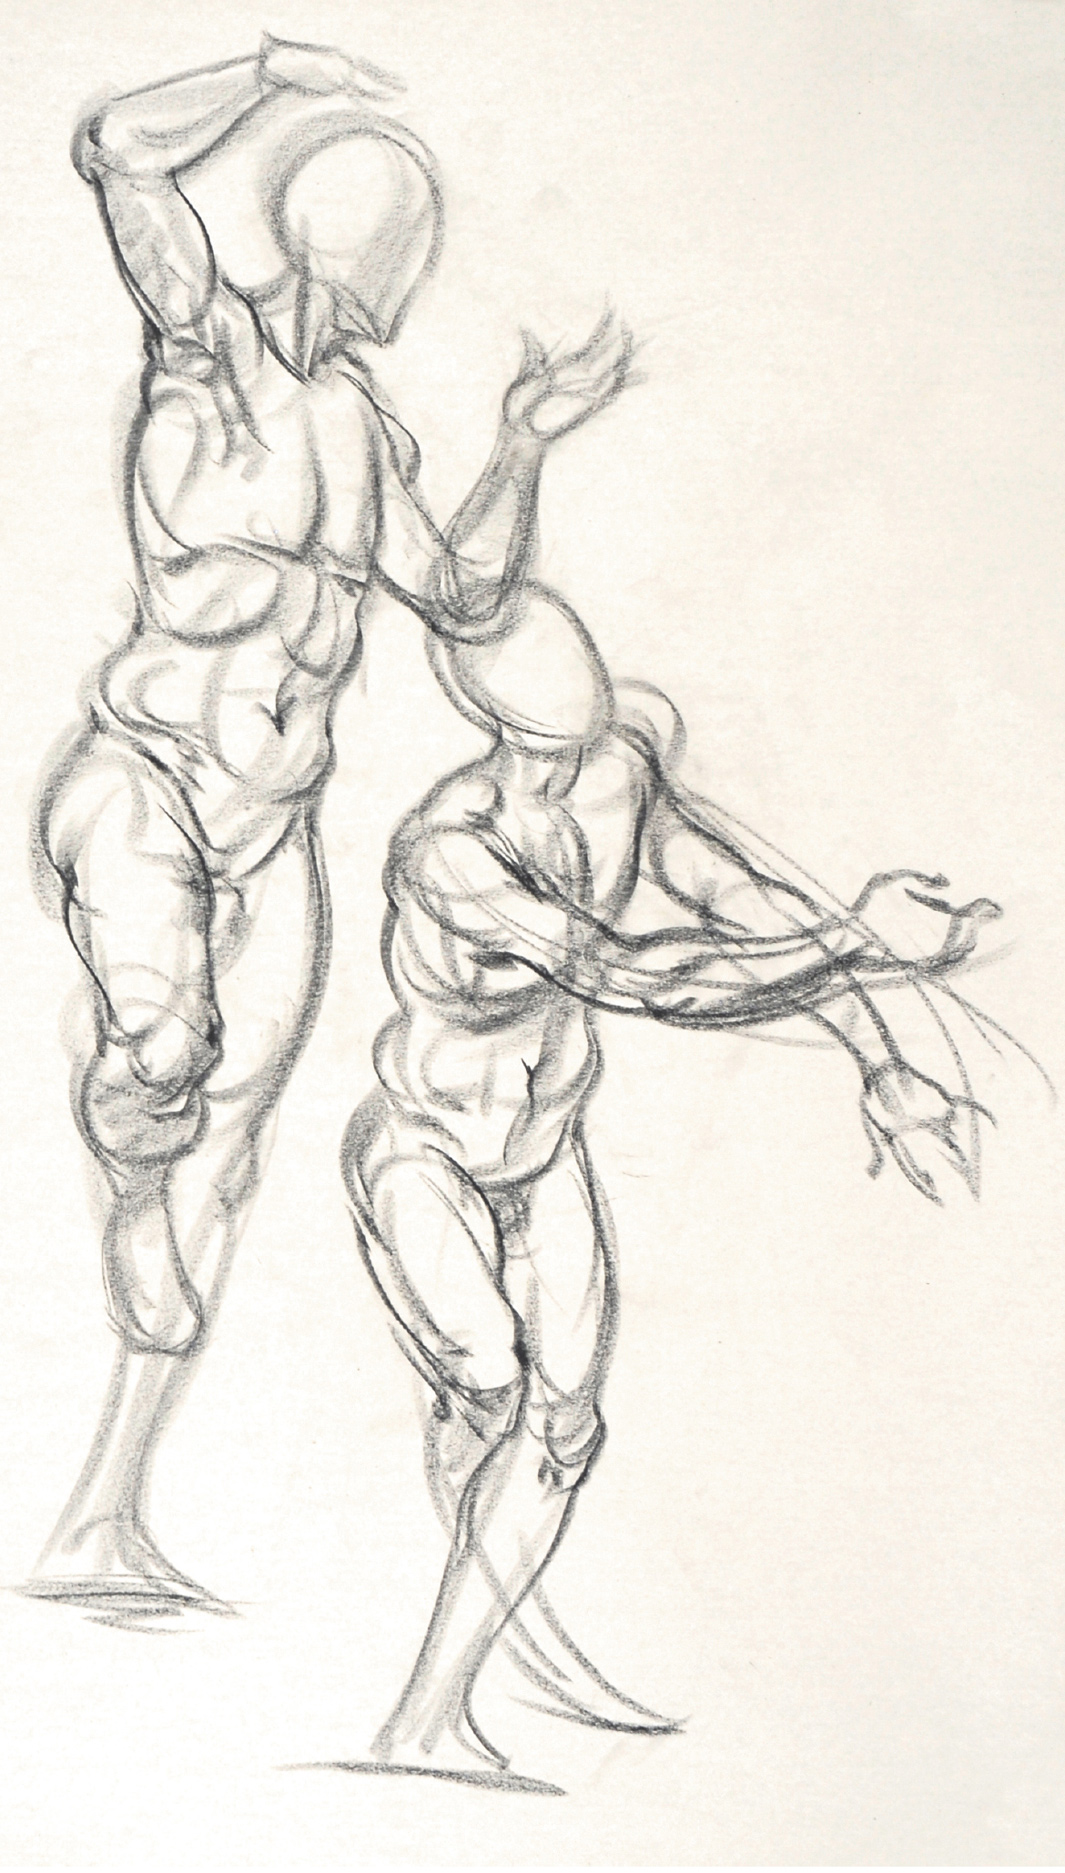
Black Conté crayon on newsprint.
2-MINUTE STUDIES OF ACTION POSES
Organic line approach
Black Conté crayon on newsprint.
Method #5: The Contour Lines and Tones Approach
Poses of 3 to 5 minutes
This approach is similar to the organic line approach, but it allows you to use additional tones. The lines can be applied with a graphite pencil, charcoal, or colored pencils that are kept sharpened (see sidebar). As with the organic line approach, your lines can vary in width, giving a calligraphic quality to certain parts of the drawing. Your contour lines can capture the figure’s anatomical forms—but, again, in a very selective, edited way. You can apply tones with the same tool you use for the line work, or you can dip a chamois cloth in charcoal or pastel dust and lightly smear the tones on the drawing.
GESTURE STUDY OF A FEMALE FIGURE WITH RIGHT ARM ON HIP
Contour lines and tones approach
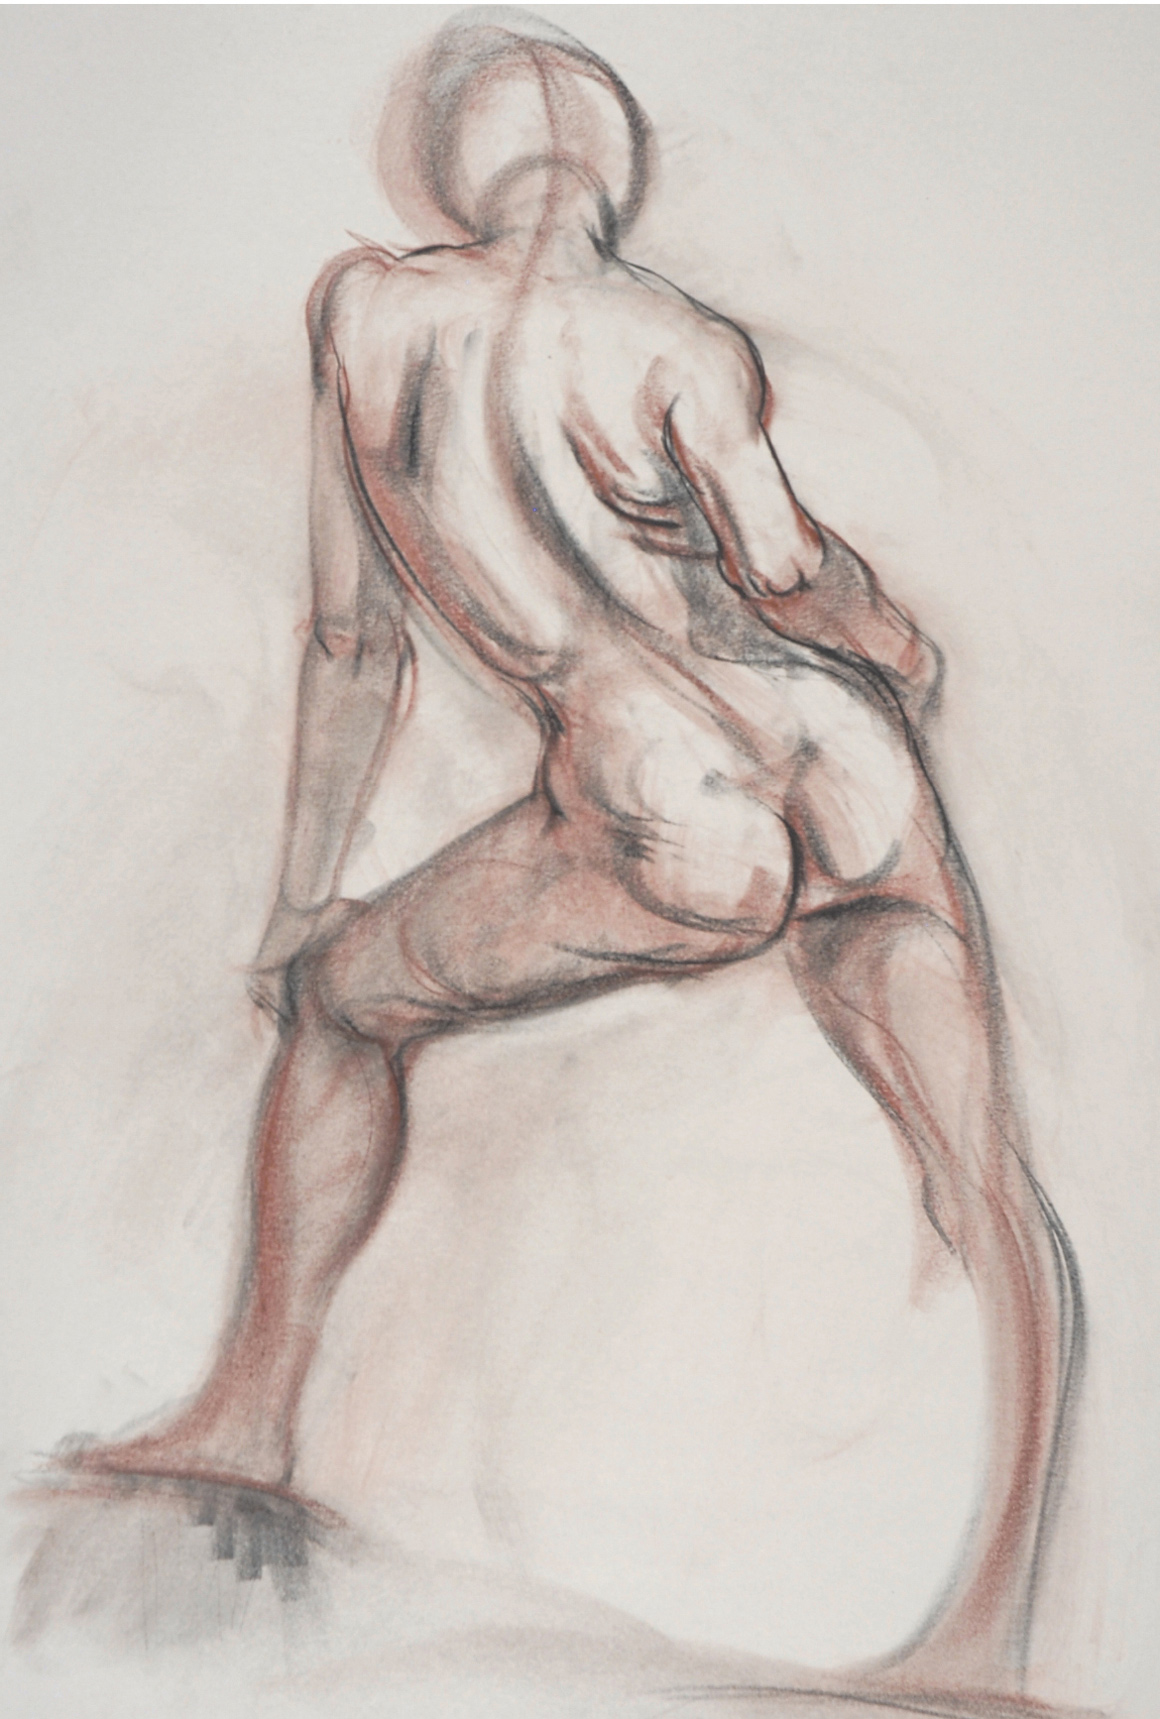
Black Conté crayon, sanguine pastel stick, and sanguine pastel dust on newsprint.
3-MINUTE GESTURE STUDIES OF THREE FIGURES
Contour lines and tones approach
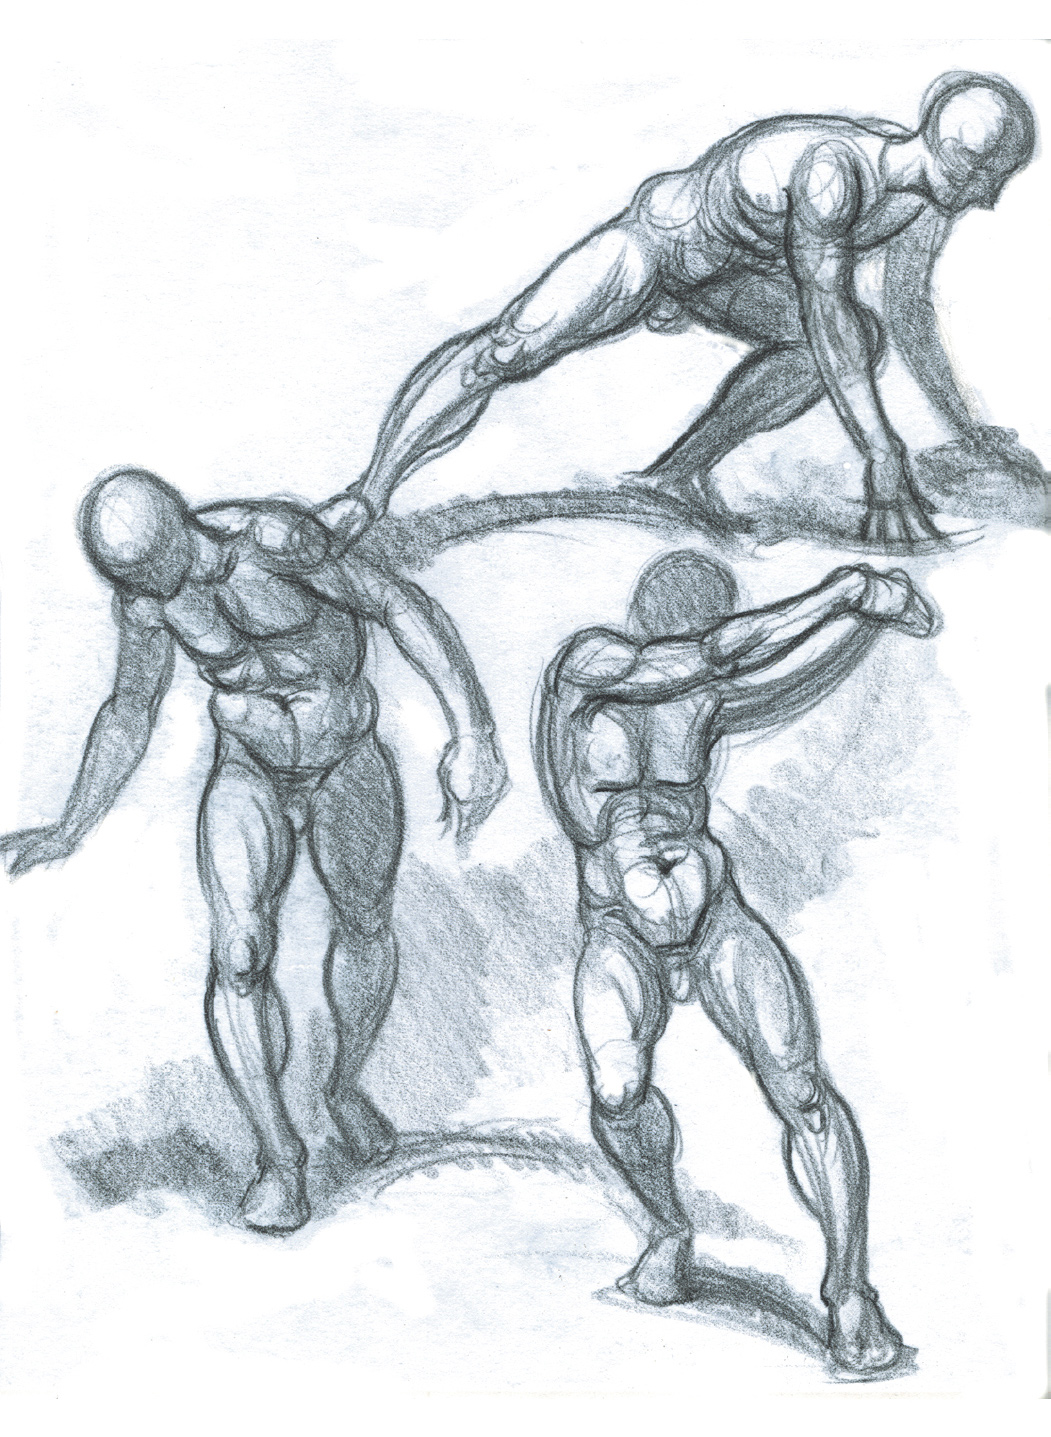
Black Conté crayon on newsprint.
Tips on Sharpening Drawing Tools
It’s a good idea to sharpen several drawing tools before a drawing session with a model. That way, should your drawing tool—graphite pencil, charcoal pencil, colored pencil, or whatever—become dull or break in the middle of a quick study, you can immediately grab a fresh, sharpened tool without missing a beat. If you have to stop to sharpen a broken pencil, you will lose precious seconds or minutes of the pose, and you will break your momentum. Plus, there is nothing more annoying to a model or to the other artists nearby than hearing someone making scraping noises or using a battery-operated sharpener during a pose.
How you sharpen your tools depends on the tool and your own preference. Many artists hand-sharpen their charcoal pencils or graphite pencils (encased in wood) with a mat knife or X-Acto knife, gently cutting away the wood and then sharpening the exposed graphite or charcoal on a piece of sandpaper. This sharpening procedure works well if you want the tool to produce “calligraphic” lines, with strokes varying from thick to thin. Manual or battery-operated pencil sharpeners are good if you want to keep the tip of the tool sharp for the application of fine lines.
Method #6: The Anatomical Gesture Approach
Poses of 5 to 10 minutes
Because the poses for this approach are somewhat longer, you’ll have time to indicate a few anatomical forms, including musculature, within the study. But you have to work briskly, since the poses are still rather brief. Select the anatomical forms you want to emphasize, and keep them simple.
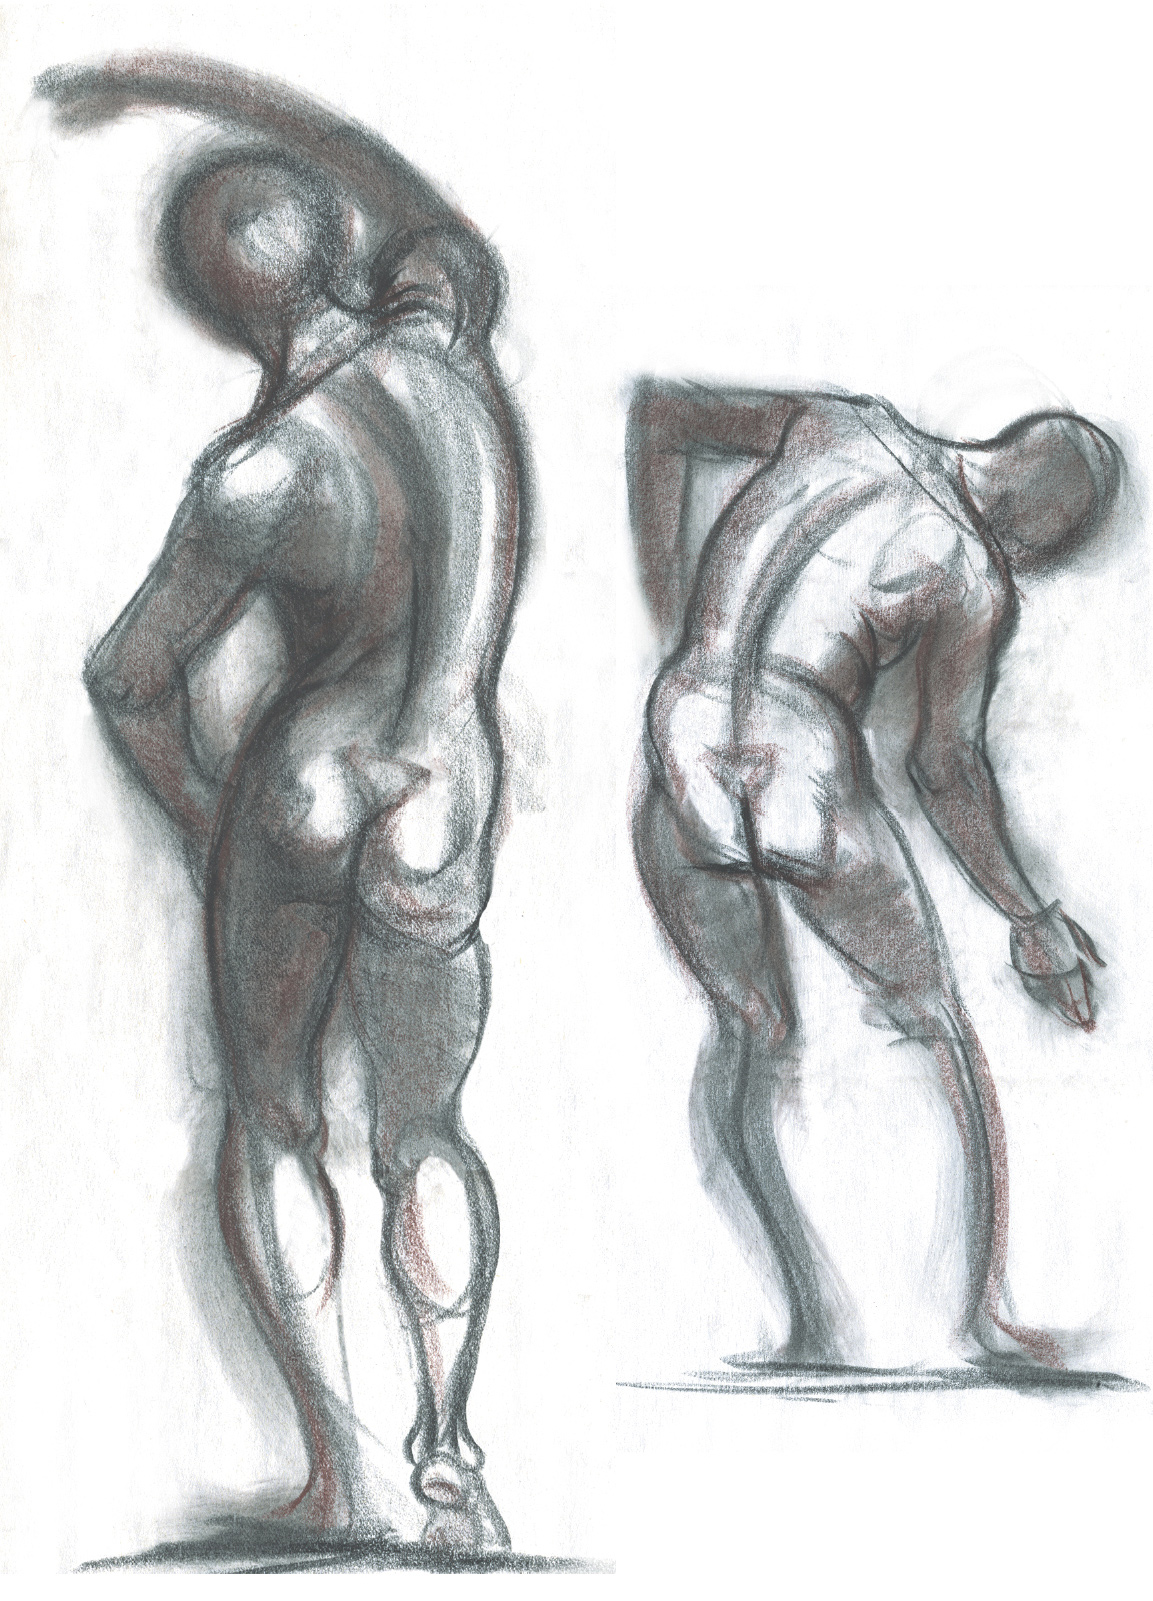
STUDY OF A MALE FIGURE PLACING HIS HANDS AGAINST A WALL
Anatomical gesture approach
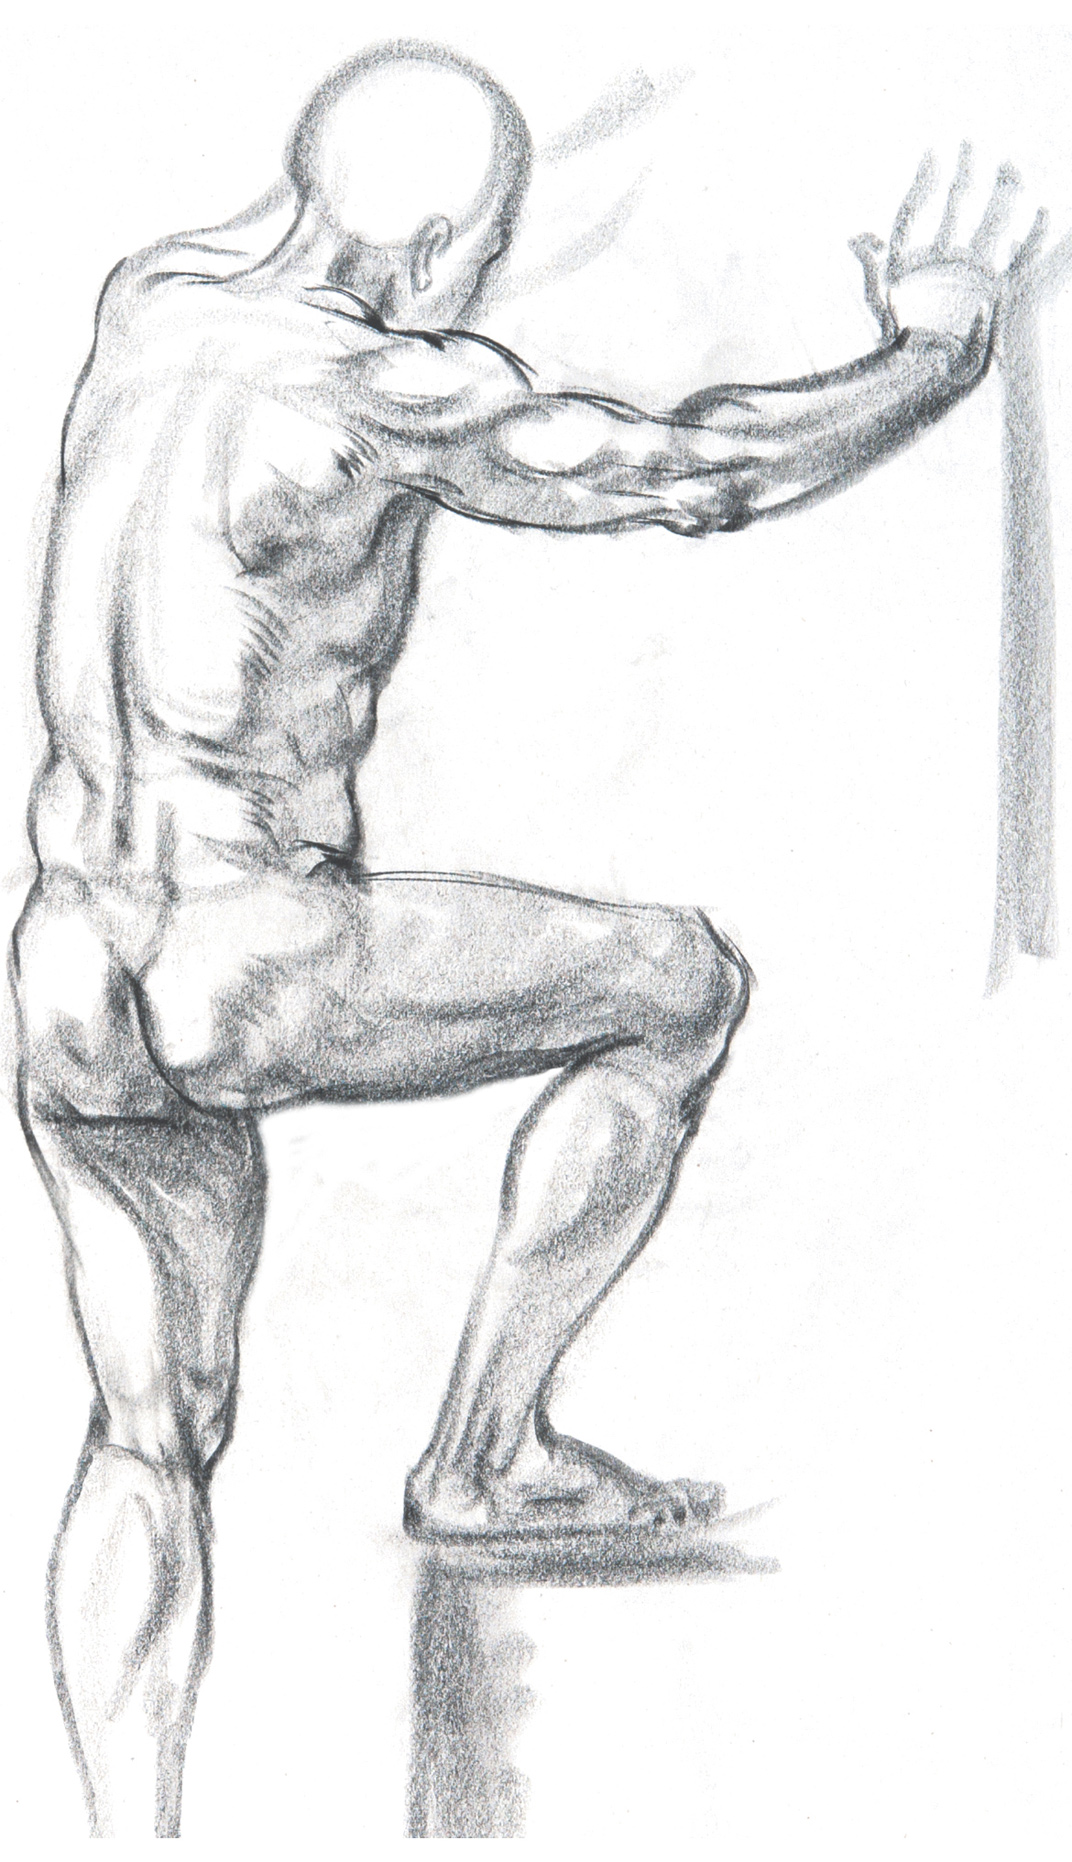
Black Conté crayon on white paper.
GESTURE STUDY OF A MALE FIGURE FROM A SIDE VIEW
Anatomical gesture approach
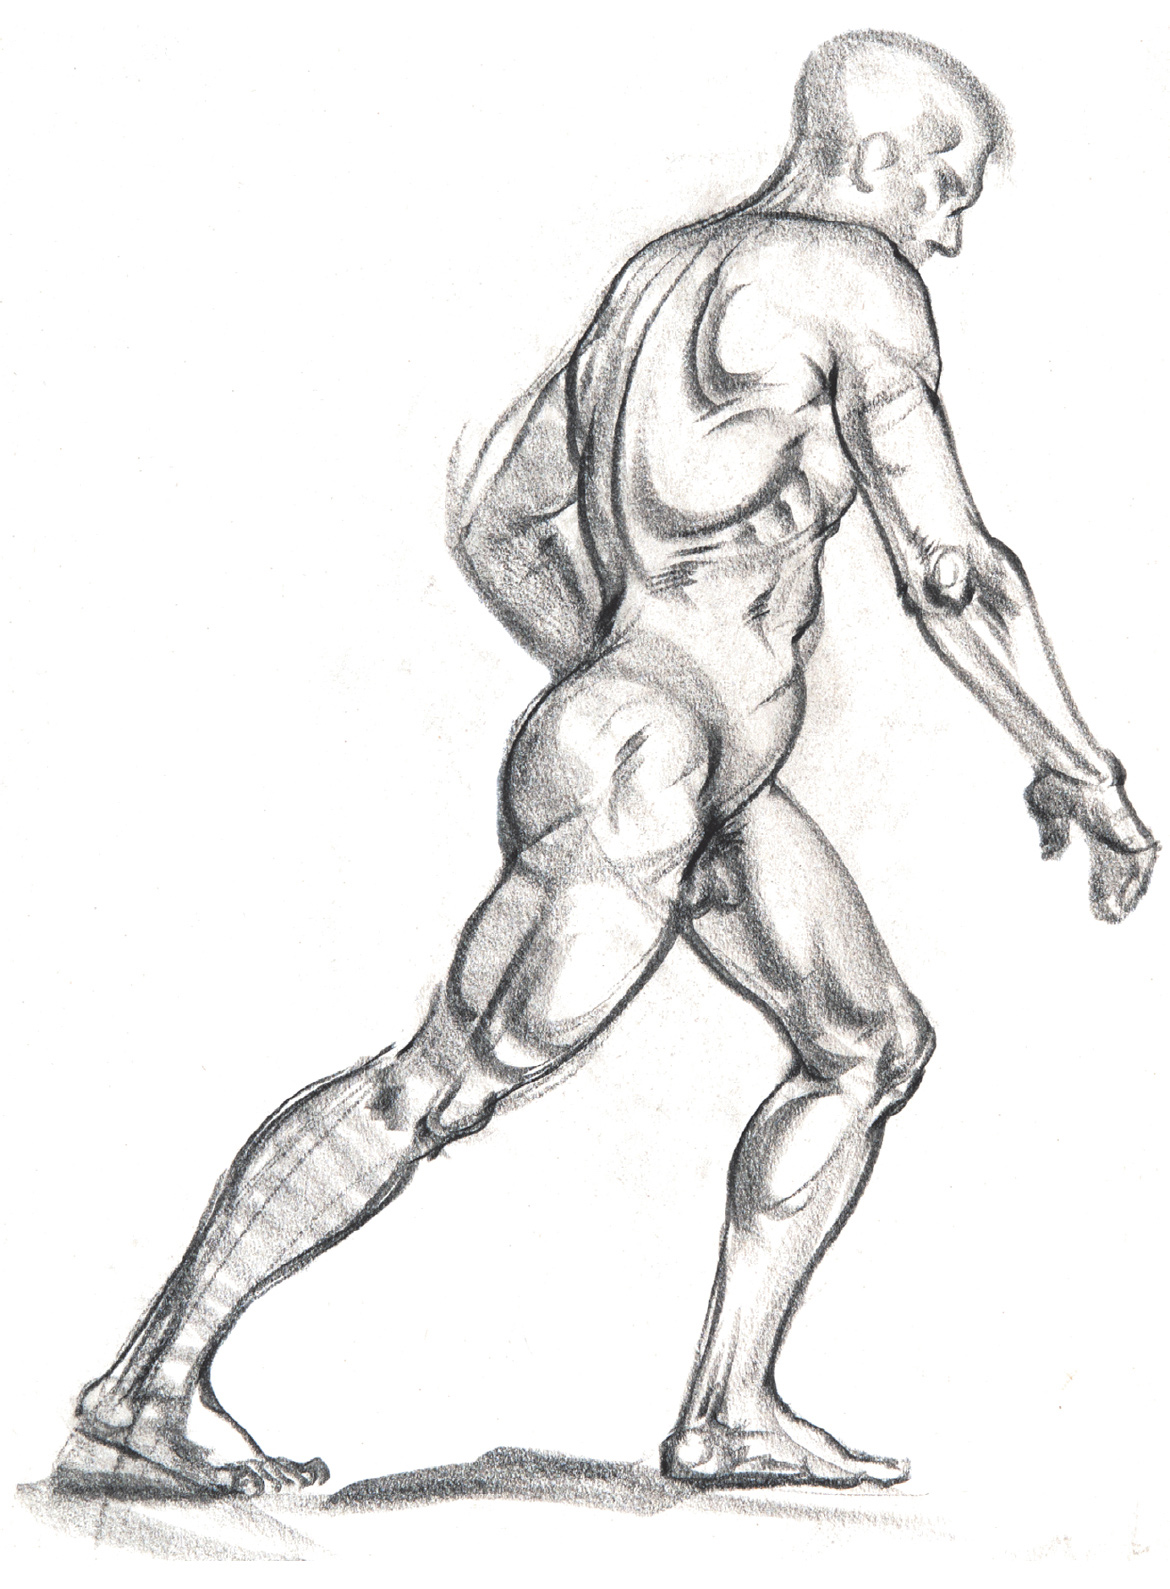
Black Conté crayon on newsprint.
Method #7: The Manikin Approach
Poses of 5 to 10 minutes
In the manikin approach, you draw a very simple figure as a preliminary structure, using geometric or organic shapes. Once this manikin is in place, you add the anatomical forms on top of the preliminary drawing. This approach works well for 5- to 10-minute poses (and for longer poses, as well) because you have the time to quickly set up the basic pose and then to flesh out some of the anatomical form. The key is to keep the manikin simple and very loose. Even 10 minutes is not much time!
When drawing the manikin, use whatever shapes work best for the particular pose—egg shapes for the head and rib cage, wedges or blocks for the pelvis, and cylinders or elongated rectangles for the limbs. Simple directional lines can also be used for the structure of the limbs. Because these are quick studies, the manikin can have a loose or even “rubbery” quality; don’t try to establish an accurate geometric structure. Try not to take too much time on this preliminary step; 30 seconds is all you need for a 5-minute study. Once you have the manikin in place, look at the dynamics of the pose to see whether there is any compression, stretching, or twisting of the forms. If so, apply some dynamic lines on top of the manikin to convey what is happening. Remember to limit your emphasis to what is interesting or essential in that particular pose, editing out all unnecessary information.
You might want to purposely emphasize the manikin shape within the final drawing as a way of indicating the basic structure of a particular pose. To do this, you might draw the manikin in a color (a sanguine, say) while using black for the anatomical forms.
Try different drawing tools to see which combination works well for you. Some artists use a light marker to block in the manikin and then use pencil or pen for the anatomical lines. Others use vine charcoal for the manikin and then either a charcoal pencil or pastel pencil for the dynamics of the form. You will be surprised at how much information you can get down on the paper with this method, even in a 5-minute pose.
GESTURE STUDY OF A SITTING FIGURE
Manikin approach
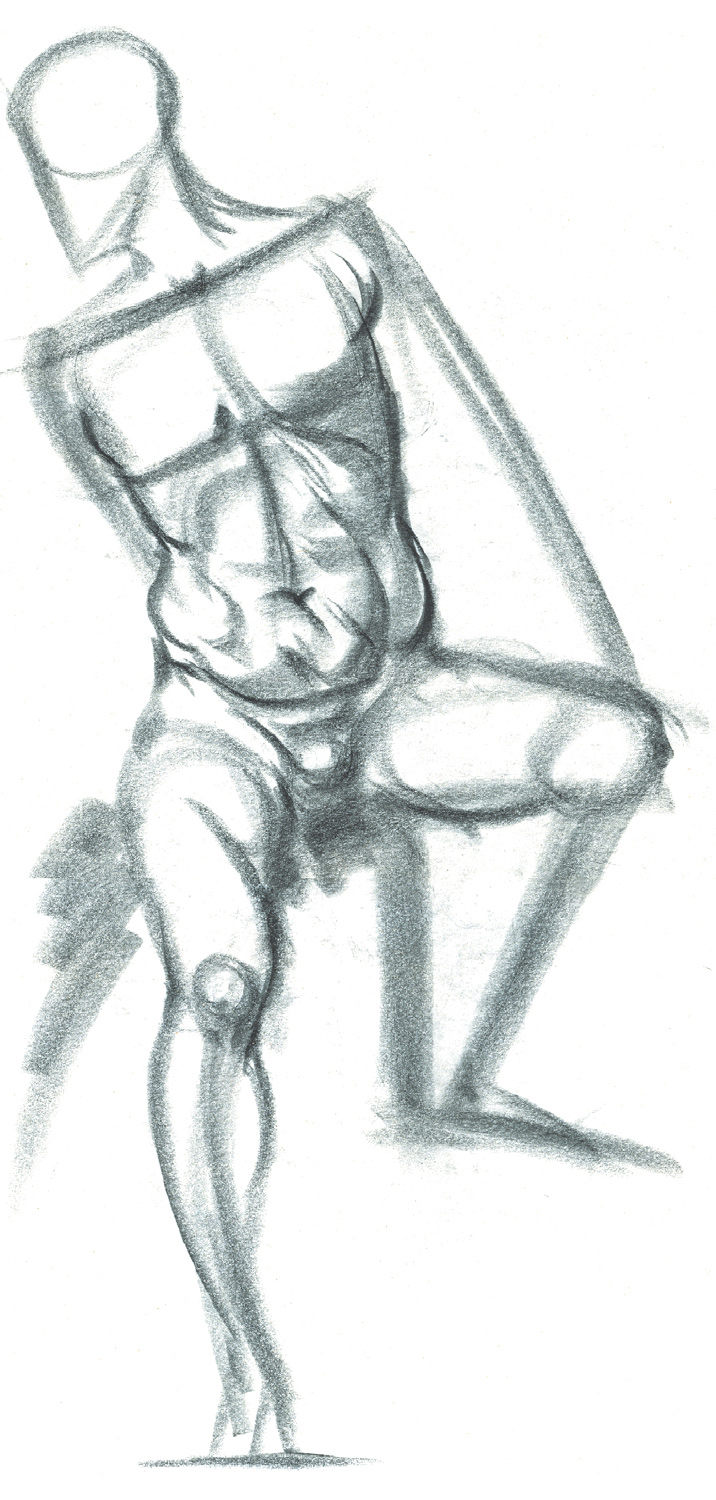
Black Conté crayon on newsprint.
GESTURE STUDY OF TWO FIGURES, EMPHASIZING STRUCTURE
Manikin approach
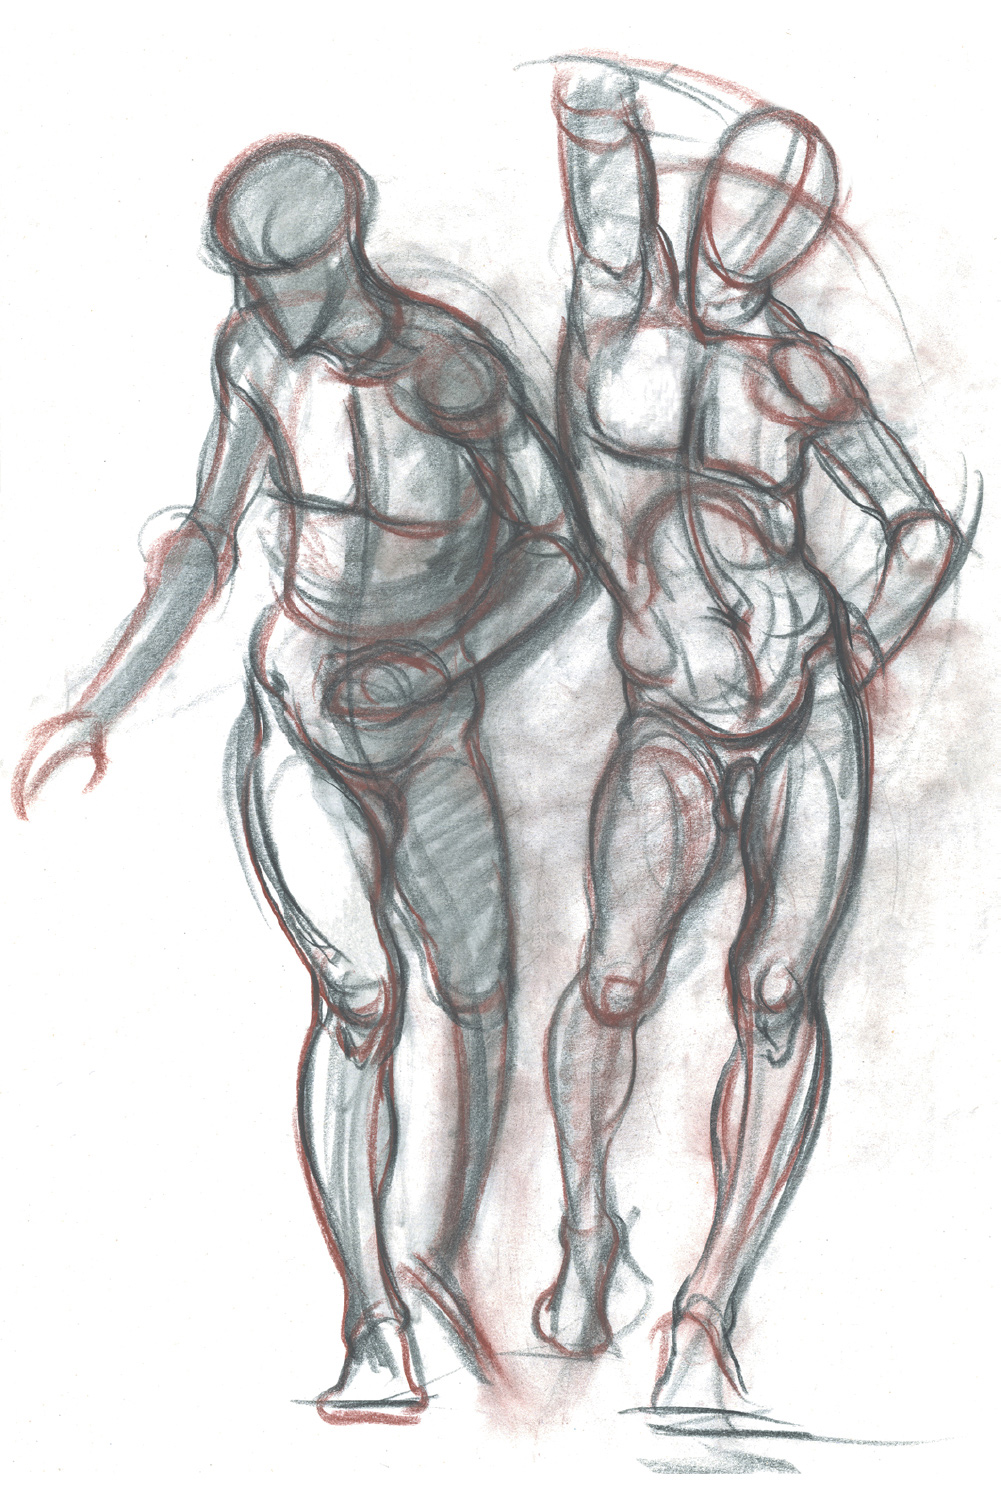
Sanguine and black Conté crayon on newsprint.
Method #8: The Toned Paper Approach
Poses of 5 to 10 minutes
In this approach, you work on a toned-paper surface. Commercially made toned papers are available in a wide variety of colors, with smoother or rougher textures. For gesture studies done in pastel pencils or charcoal, you should choose a paper that has some “tooth”—that is, that is slightly rough. If working in pen, a slightly smoother paper works better because your pen strokes might snag or skip on a rougher surface. Color is up to you, though many artists stick with neutral tones (grays, beiges) or light blues or greens. For lines and tones, use charcoal pencils, Conté crayons, graphite pencils, watercolor pencils, pastel pencils, or pens (e.g., ballpoint pens, technical pens, brush-marker pens, marker pens with fine or chiseled tips, traditional dip pens, bamboo reed pens). But also add a white or cream-colored drawing tool into the mix—a white Conté crayon, a light pastel pencil, or white charcoal—so that you can capture some of the lights. Work at a brisk pace to give yourself time, near the end of the pose, to apply at least a few lights to the figure.
GESTURE STUDY OF A TORSO IN A BACK VIEW
Toned paper approach
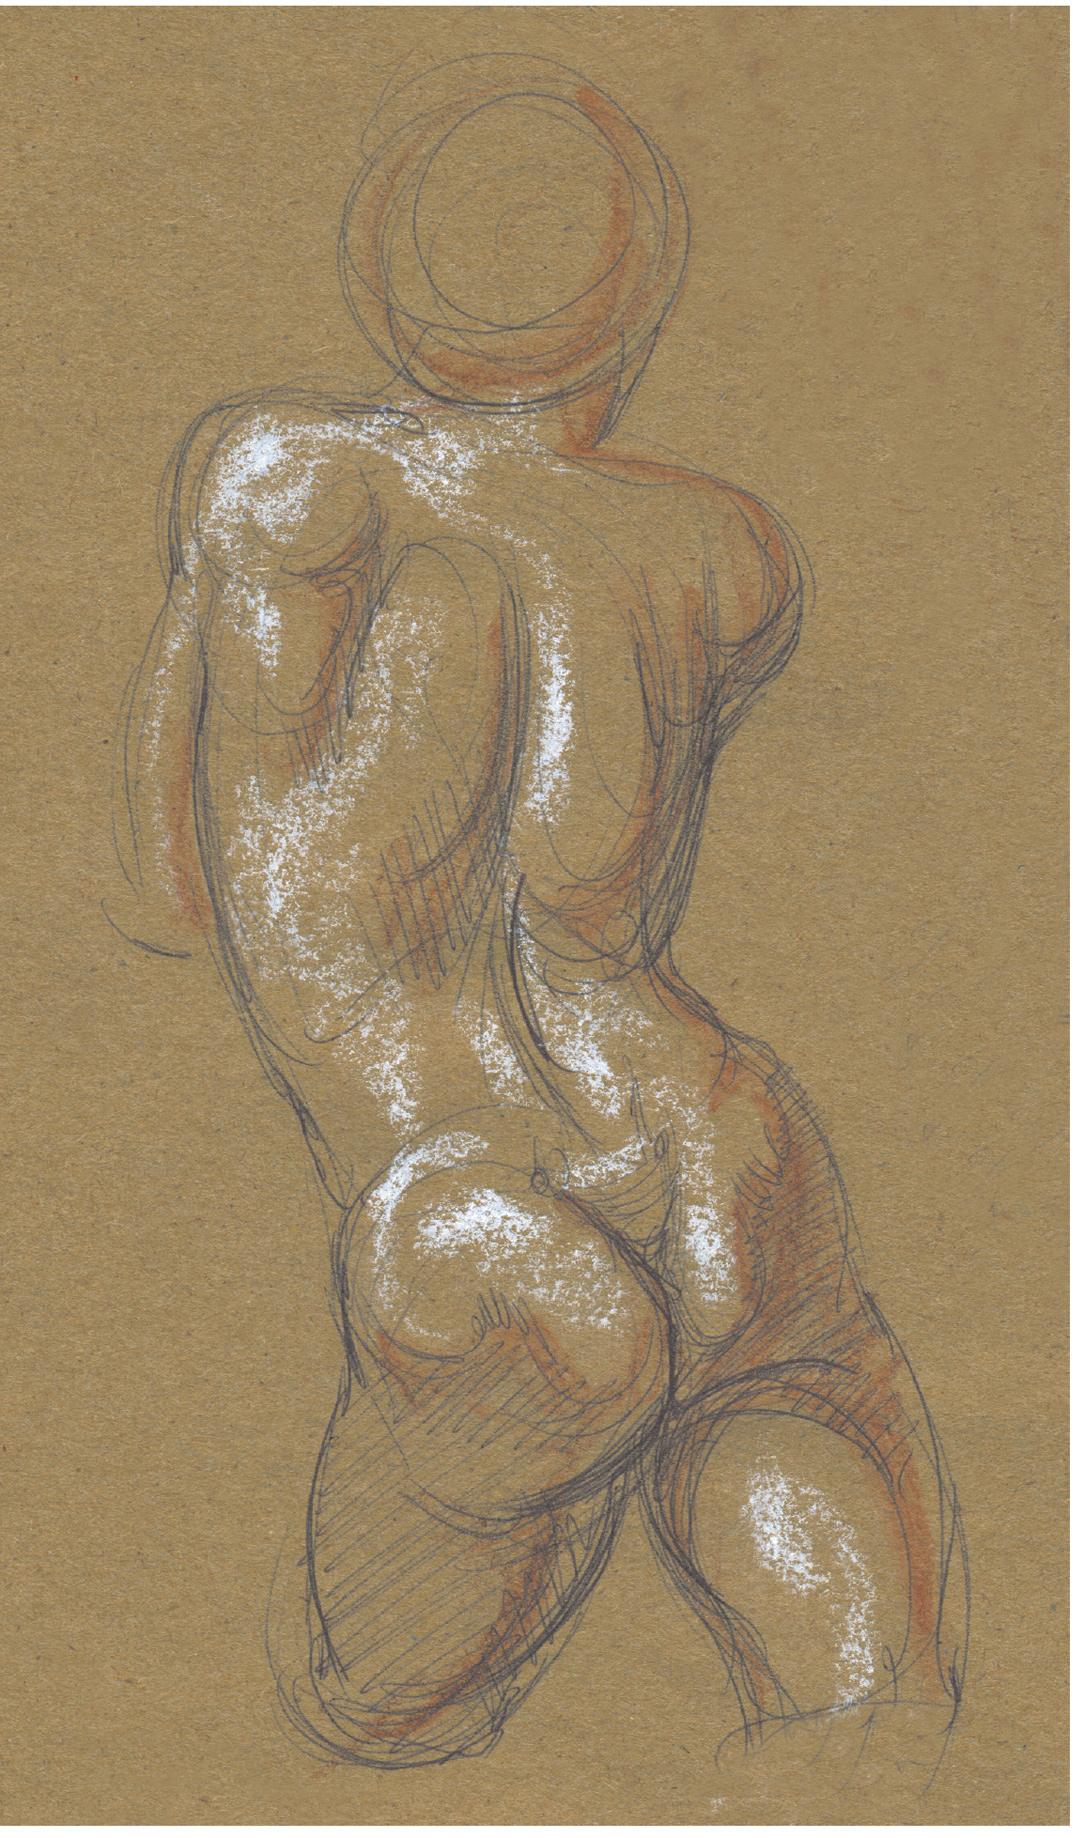
Ballpoint pen, watercolor pencil, and white chalk on toned paper.
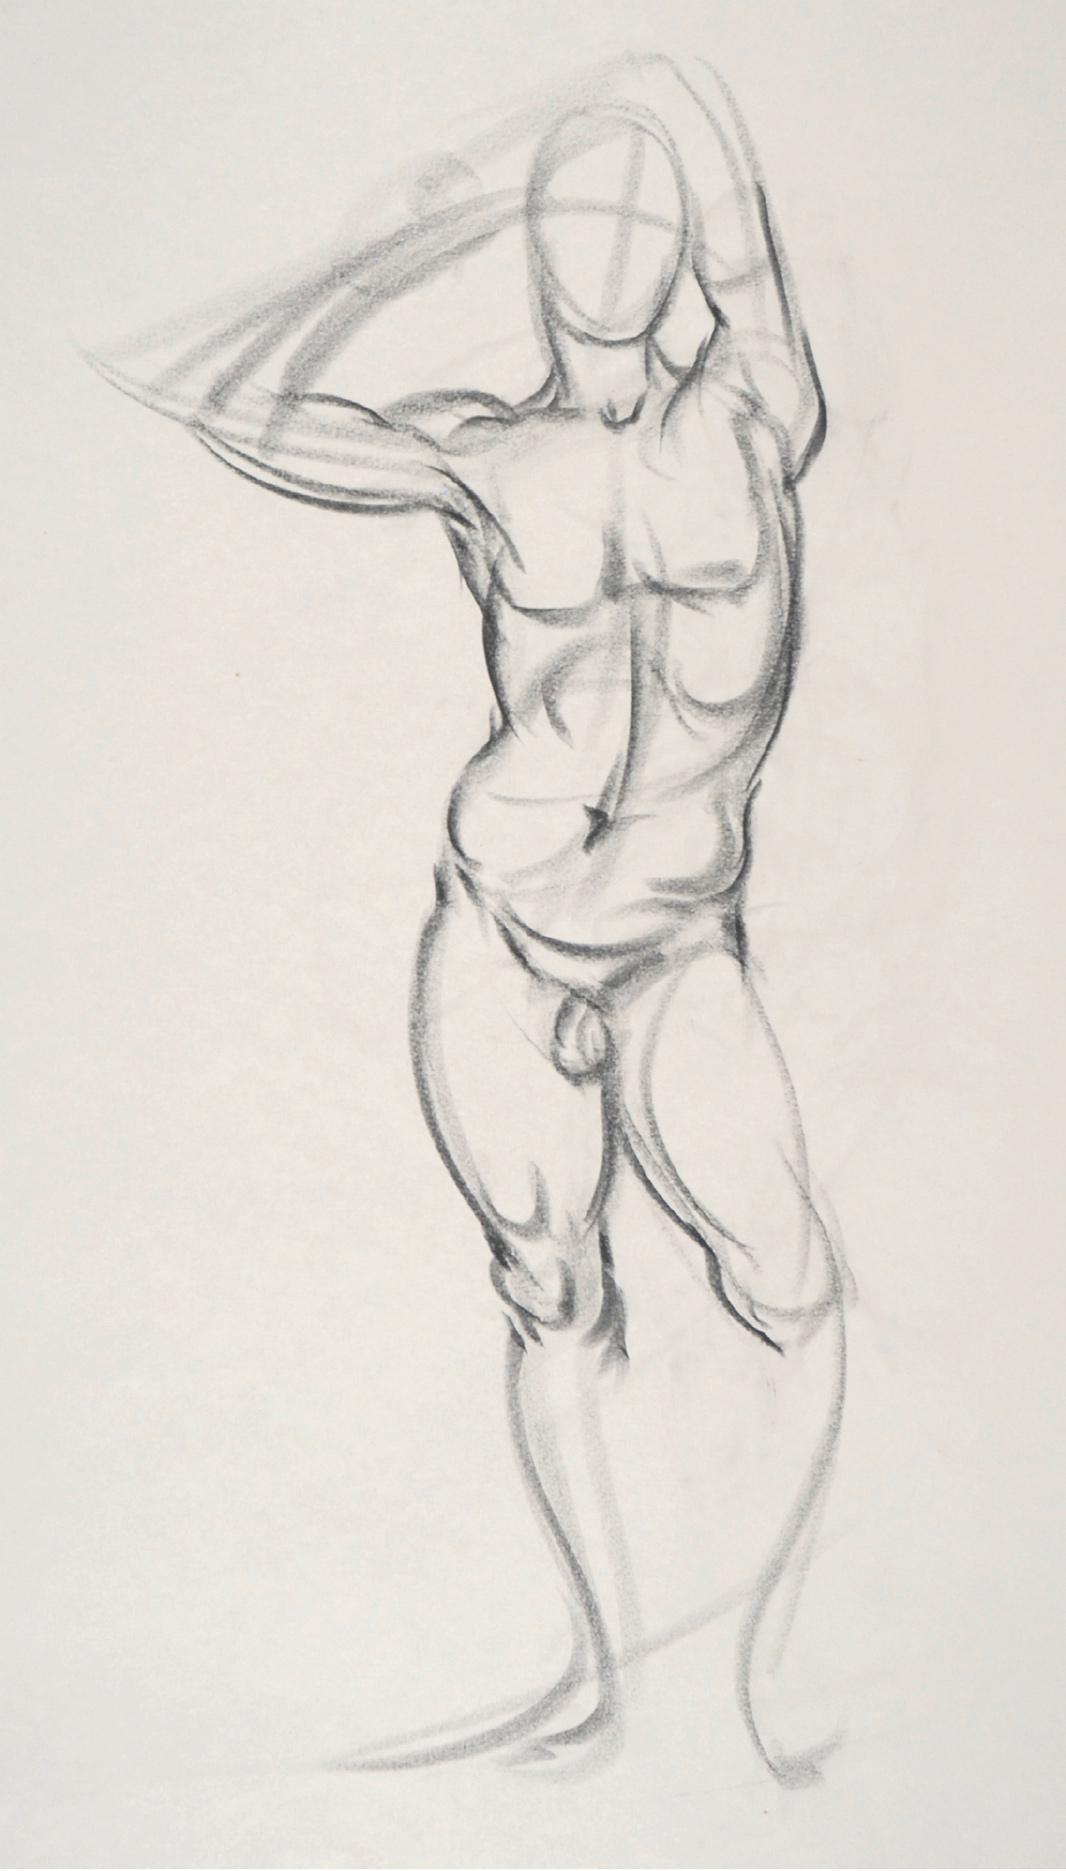
GESTURE STUDY OF A FEMALE FIGURE WITH HANDS CLASPED BEHIND HER HEAD
Toned paper approach
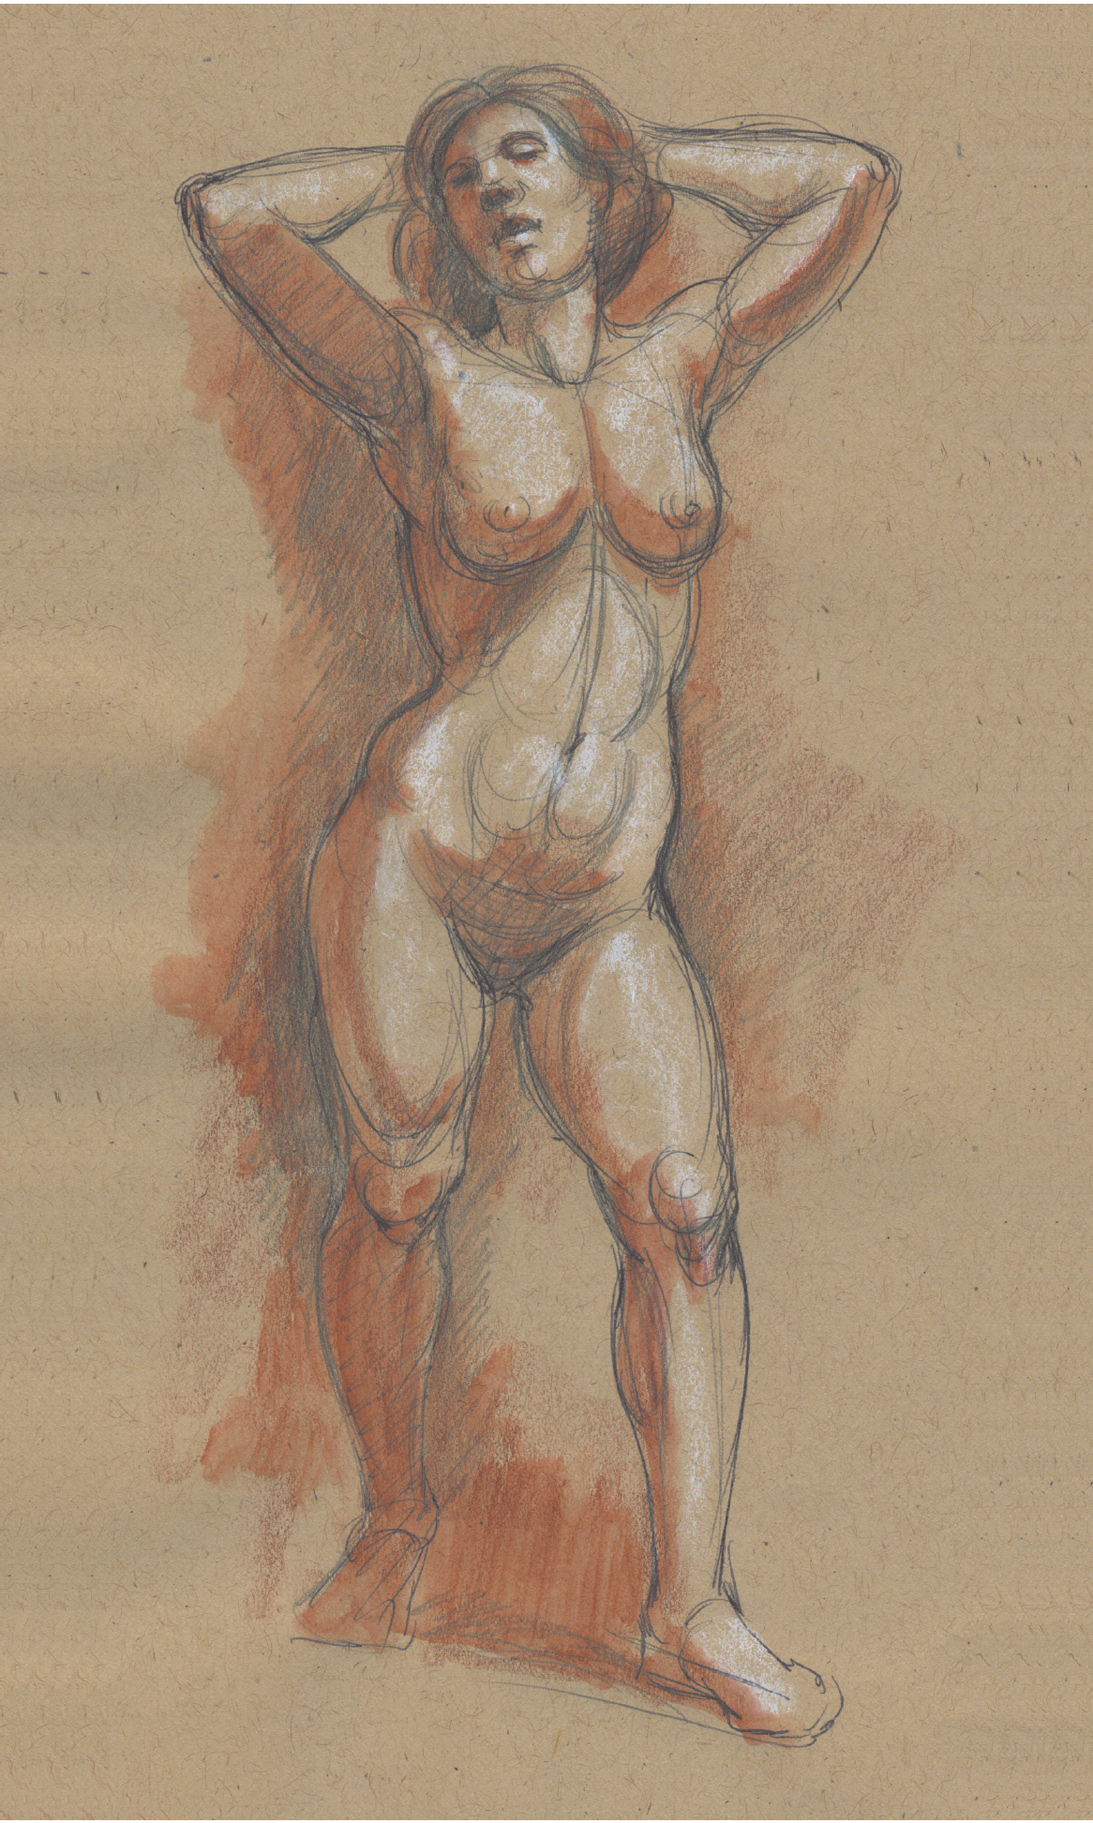
Ballpoint pen, graphite pencil, sanguine watercolor pencil, and white chalk on toned paper.
Enhancing Gesture Drawings
Some gesture drawings are magical, capturing the action of a pose in such a dynamic way that tinkering with the drawing would drain it of its vitality. In such instances, it is best not to do any more work on the drawing. Many gesture studies, however, lack energy. So what do you do with lackluster gesture studies? Throw them out? Line the bottom of a birdcage with them?
Don’t be so quick to get rid of them. In many cases, you can enhance—and improve—the original gesture drawing by exaggerating the forms, color, and line work. Enhancing gesture drawings can be an exciting exercise. Go through your old gesture drawings and pull out several that you are not thrilled with. Pick one from the pile and go over the line work, angles, forms, tones, or color, refining or tweaking the elements to any degree you want. This might seem contrary to what gesture studies are supposed to be about—capturing the essence of the pose in a very brief amount of time. But certain drawings need a boost, and this is a great way to see how far you can push certain elements. Not having the model in front of you is of no concern, because you already have the basic pose down on paper. This exercise gives you creative freedom, encourages risk-taking, and lets you explore new approaches in your drawing.
Look at the drawing and ask yourself, What do I need to do to make this more exciting? Do I need to exaggerate the pose itself? Enhance a rhythmic quality in the line? Add color to liven it up? Heighten the contrast in values? Then simply dive in, trusting your instincts. Feel free to use drawing tools other than the ones used in the original study. The trick is to avoid overworking the enhancements, which can turn the drawing into a stiff, overanalyzed study. Of course, if you do overwork it, and the drawing goes “past the point of no return,” it’s no big deal—just move on to another gesture study.
ENHANCED GESTURE DRAWING
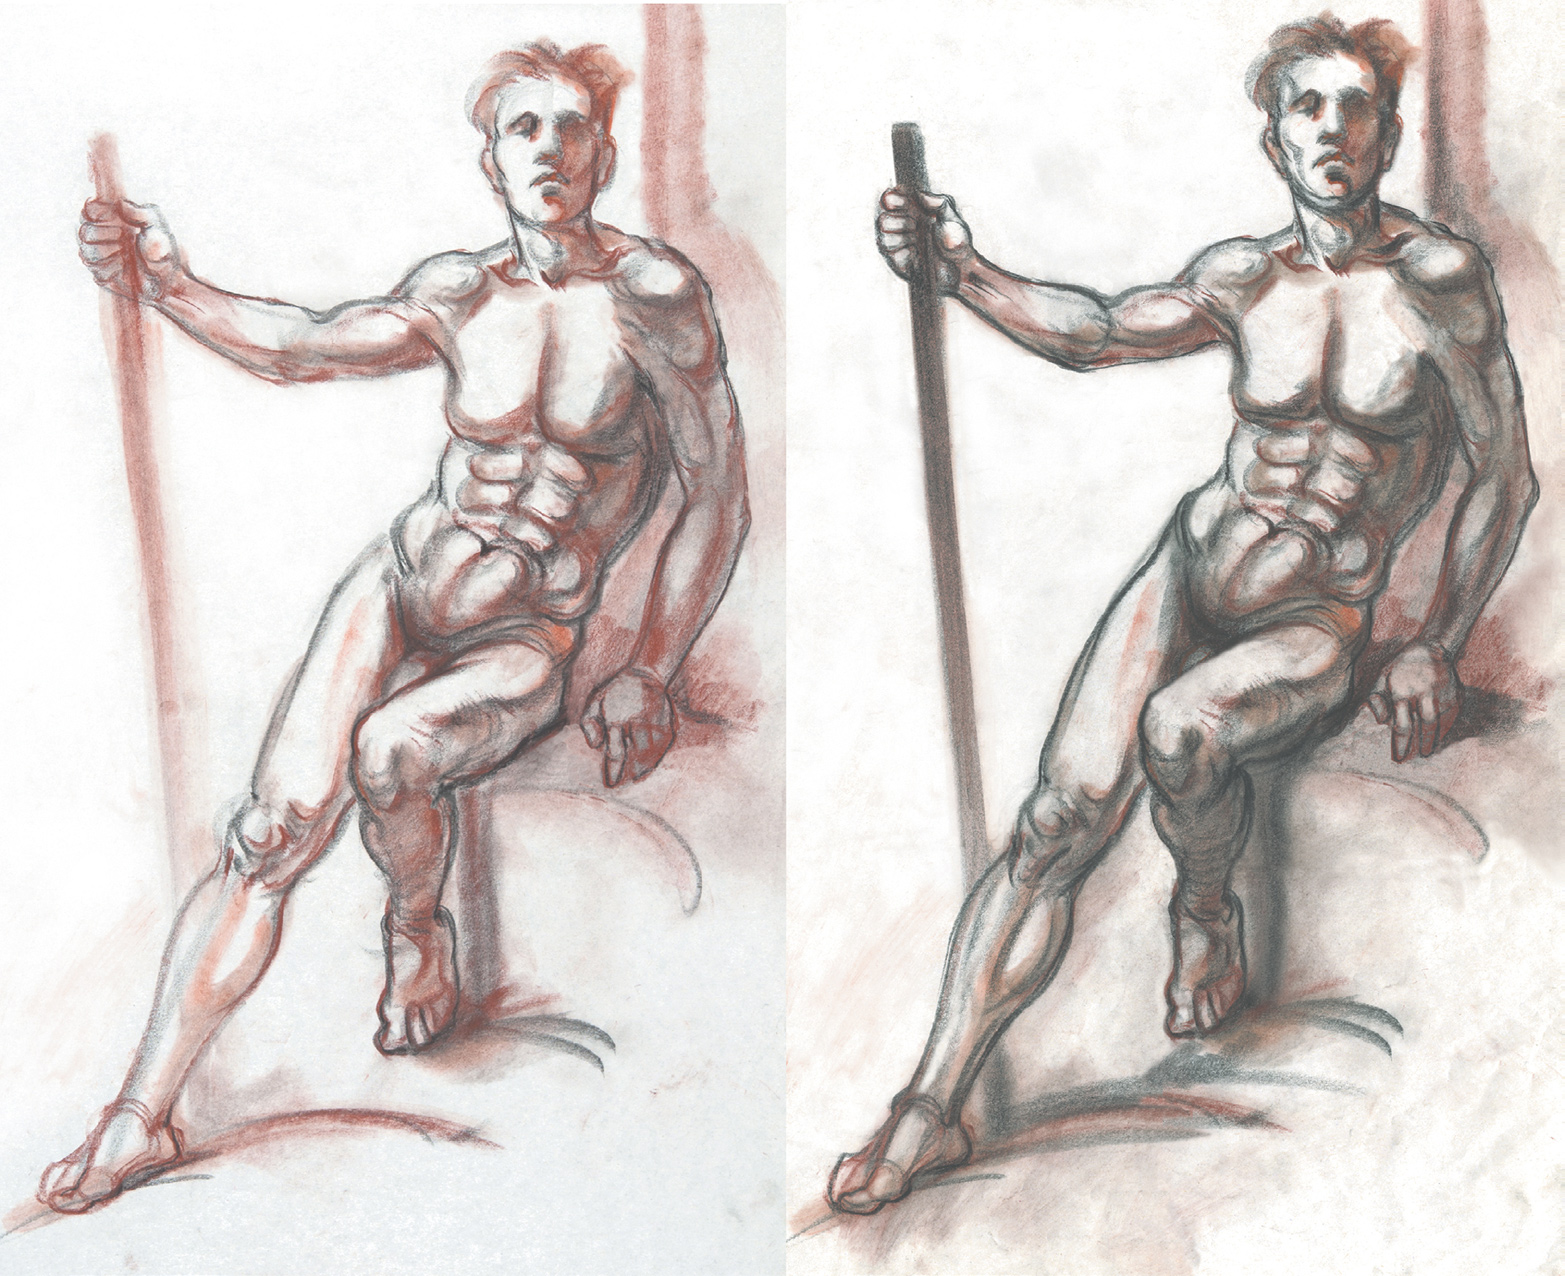
The original gesture drawing, at left, was a 5-minute study done in sanguine and black Conté crayon on newsprint. In the enhanced drawing at right, I used additional black Conté crayon for the added tones and lines.
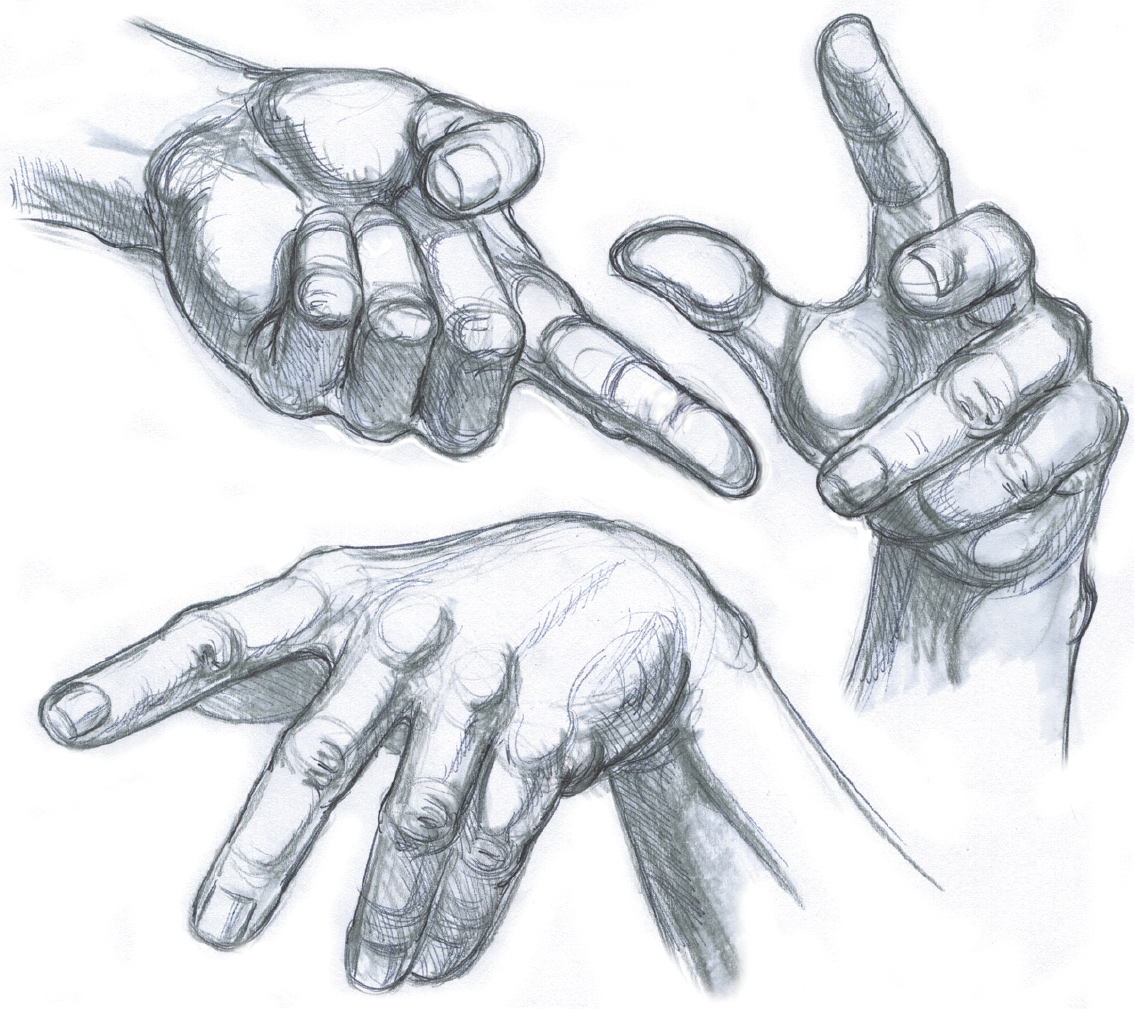
Gesture Drawings of Body Parts
Gesture drawings need not be of the entire figure. If you like, you can focus on just a part of the body—as long as the body part is engaged in some action that your drawing can convey. One advantage of zeroing in is that you’ll be able to capture a great deal more anatomical detail within a short period of time. Here are a few examples of gesture studies I’ve done of hands, feet, and heads. Some are approximately life-size; others are small sketchbook studies.
5- TO 10-MINUTE GESTURE STUDIES OF HANDS

Black Conté crayon on white paper (with added sanguine Conté crayon on the study with spread fingers).
SKETCHBOOK GESTURE STUDIES OF FEET
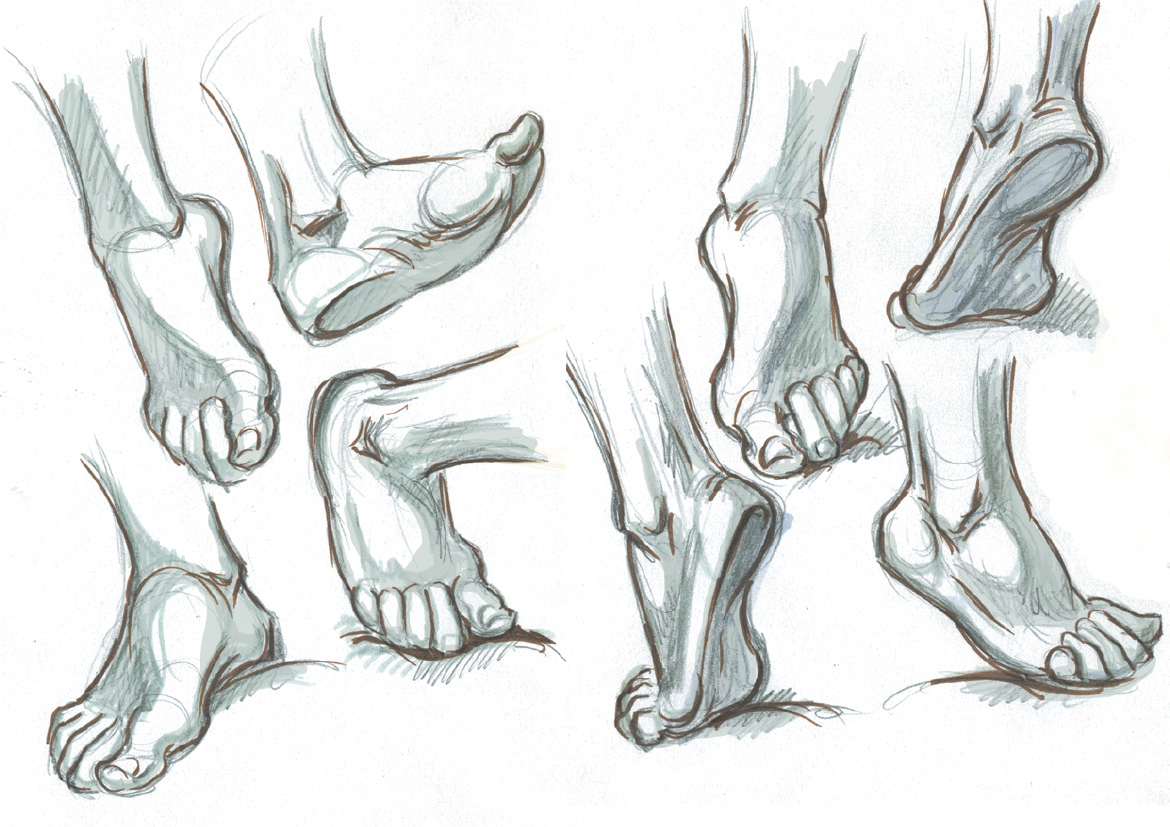
Graphite pencil, sepia ink, and gray brush-pen on white paper.
SKETCHBOOK GESTURE STUDIES OF HANDS
Ballpoint pen and gray marker on white paper.
5- TO 10-MINUTE GESTURE STUDIES OF FEET
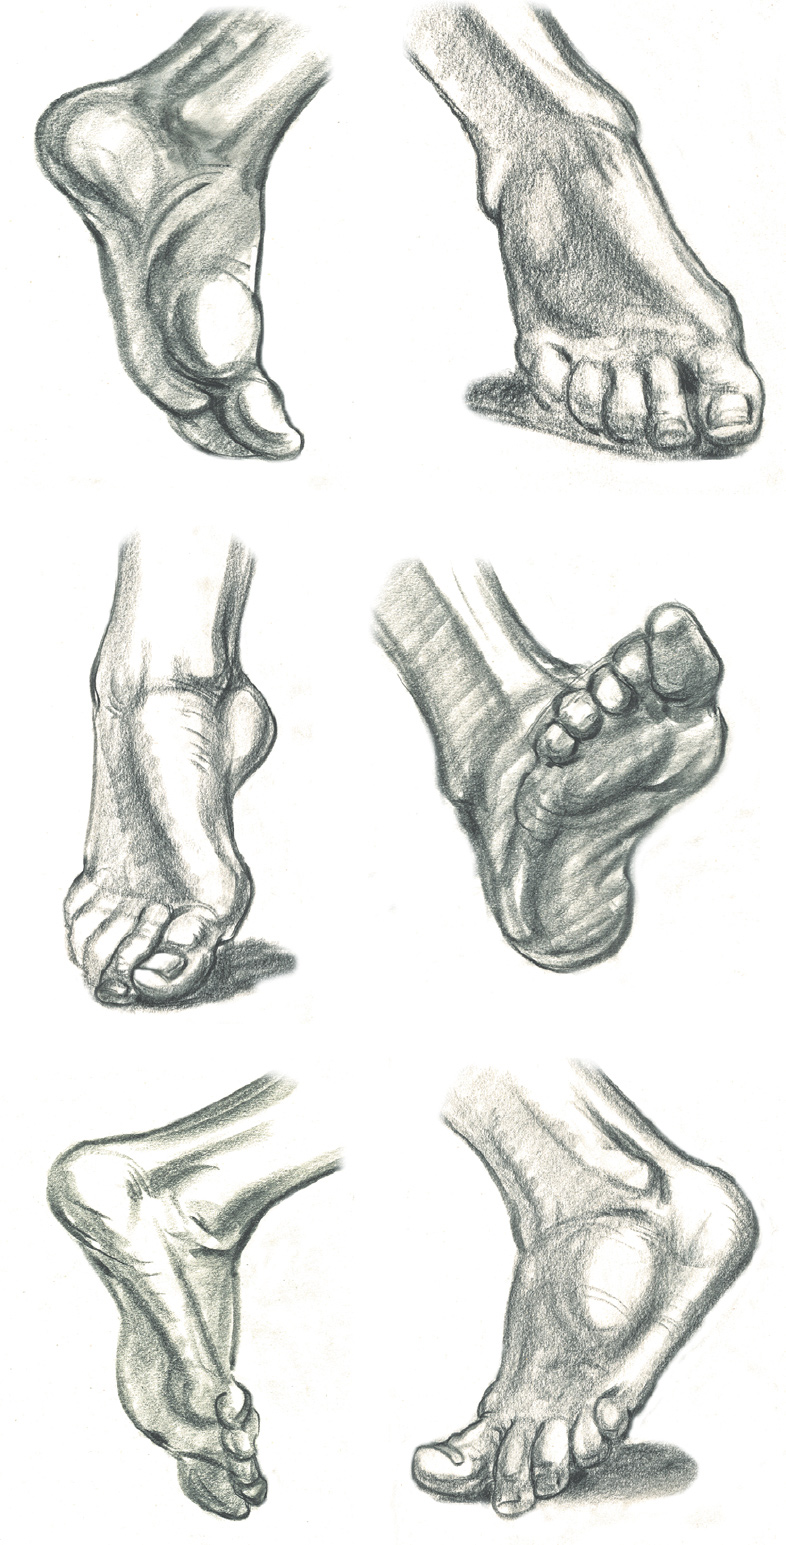
Black Conté crayon on newsprint.
SKETCHBOOK STUDIES OF HEADS
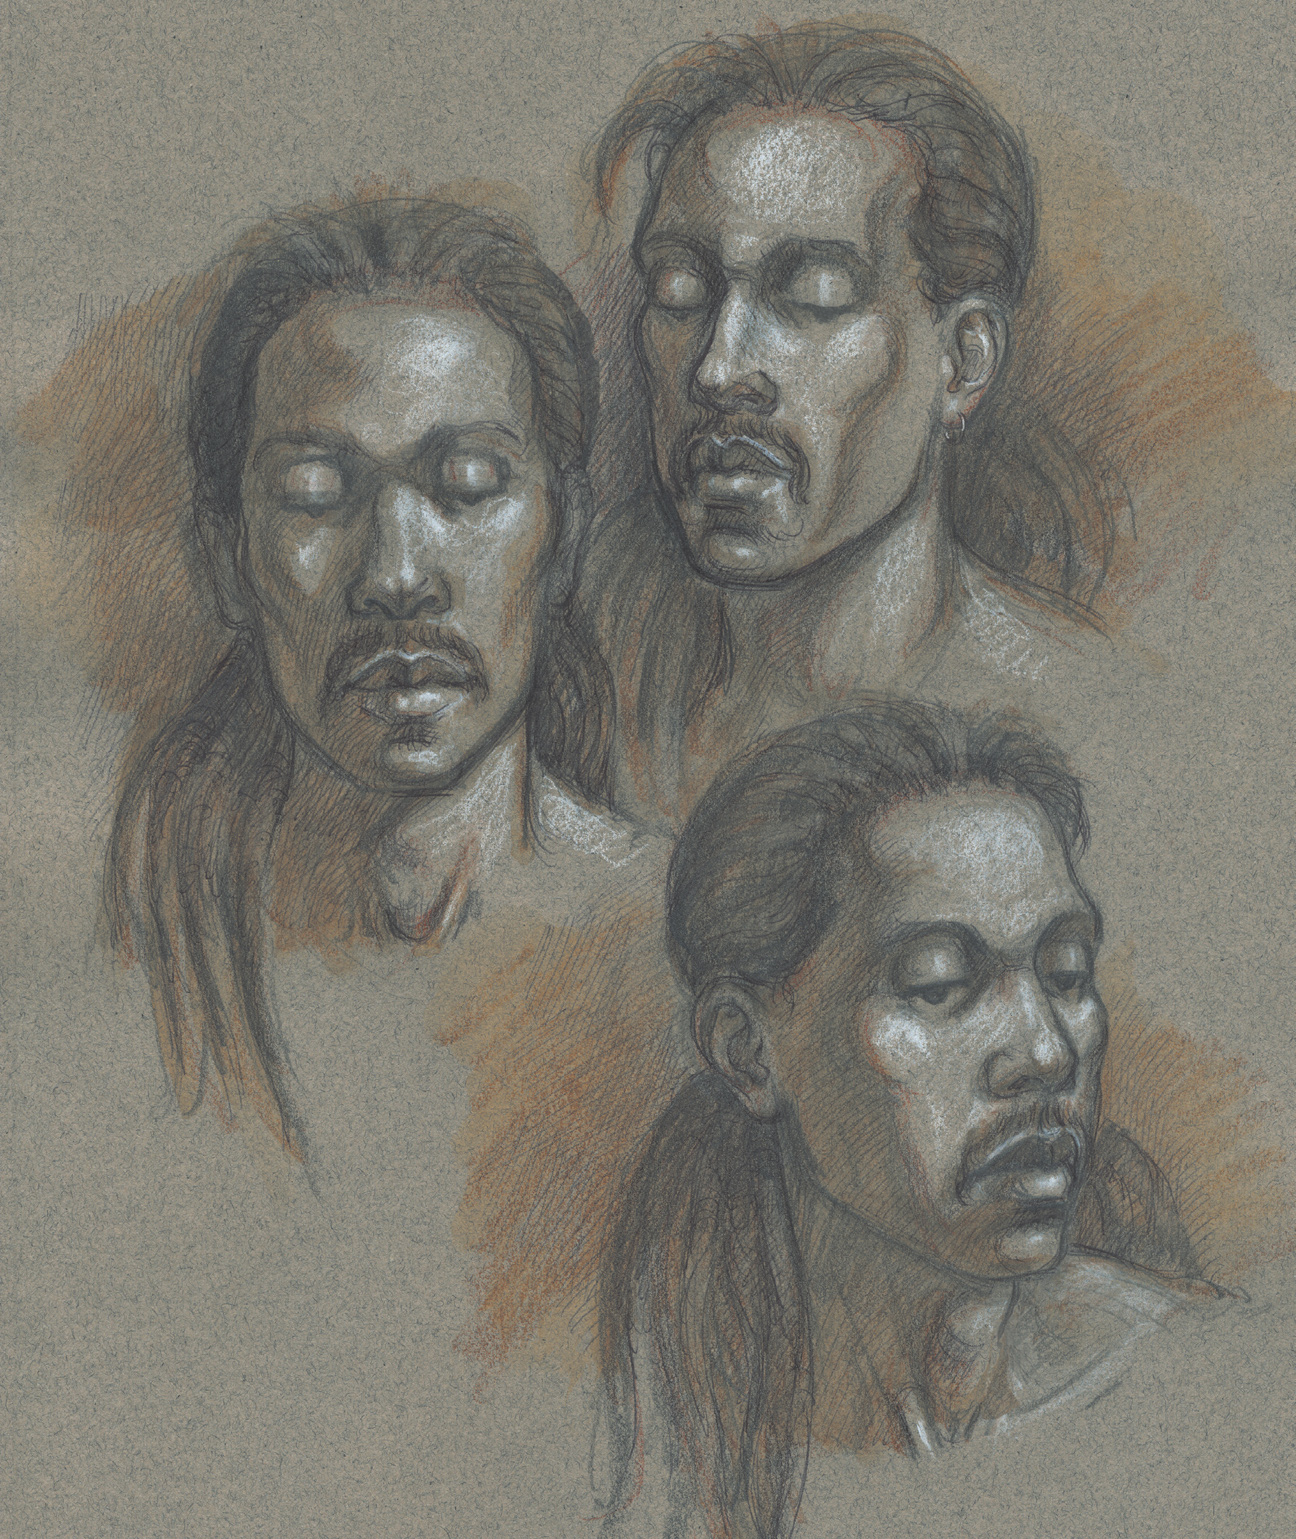
Graphite pencil and watercolor pencil enhanced with ballpoint pen and white chalk on toned paper.
Practicing Gesture Drawing—Pros and Cons
All figurative artists should try to regularly hone their skills by practicing gesture drawing. There are several ways to do this, each with its pros and cons.
Drawing from a Professional Model in a Studio Setting
Pros: This is one of the best ways to study gesture because the model is trained to hold the pose long enough for you to capture the movement. The best results happen when you have an exceptionally inspiring model who takes on interesting and challenging poses and holds the poses without moving or twitching.
GESTURE STUDY OF A STANDING FEMALE
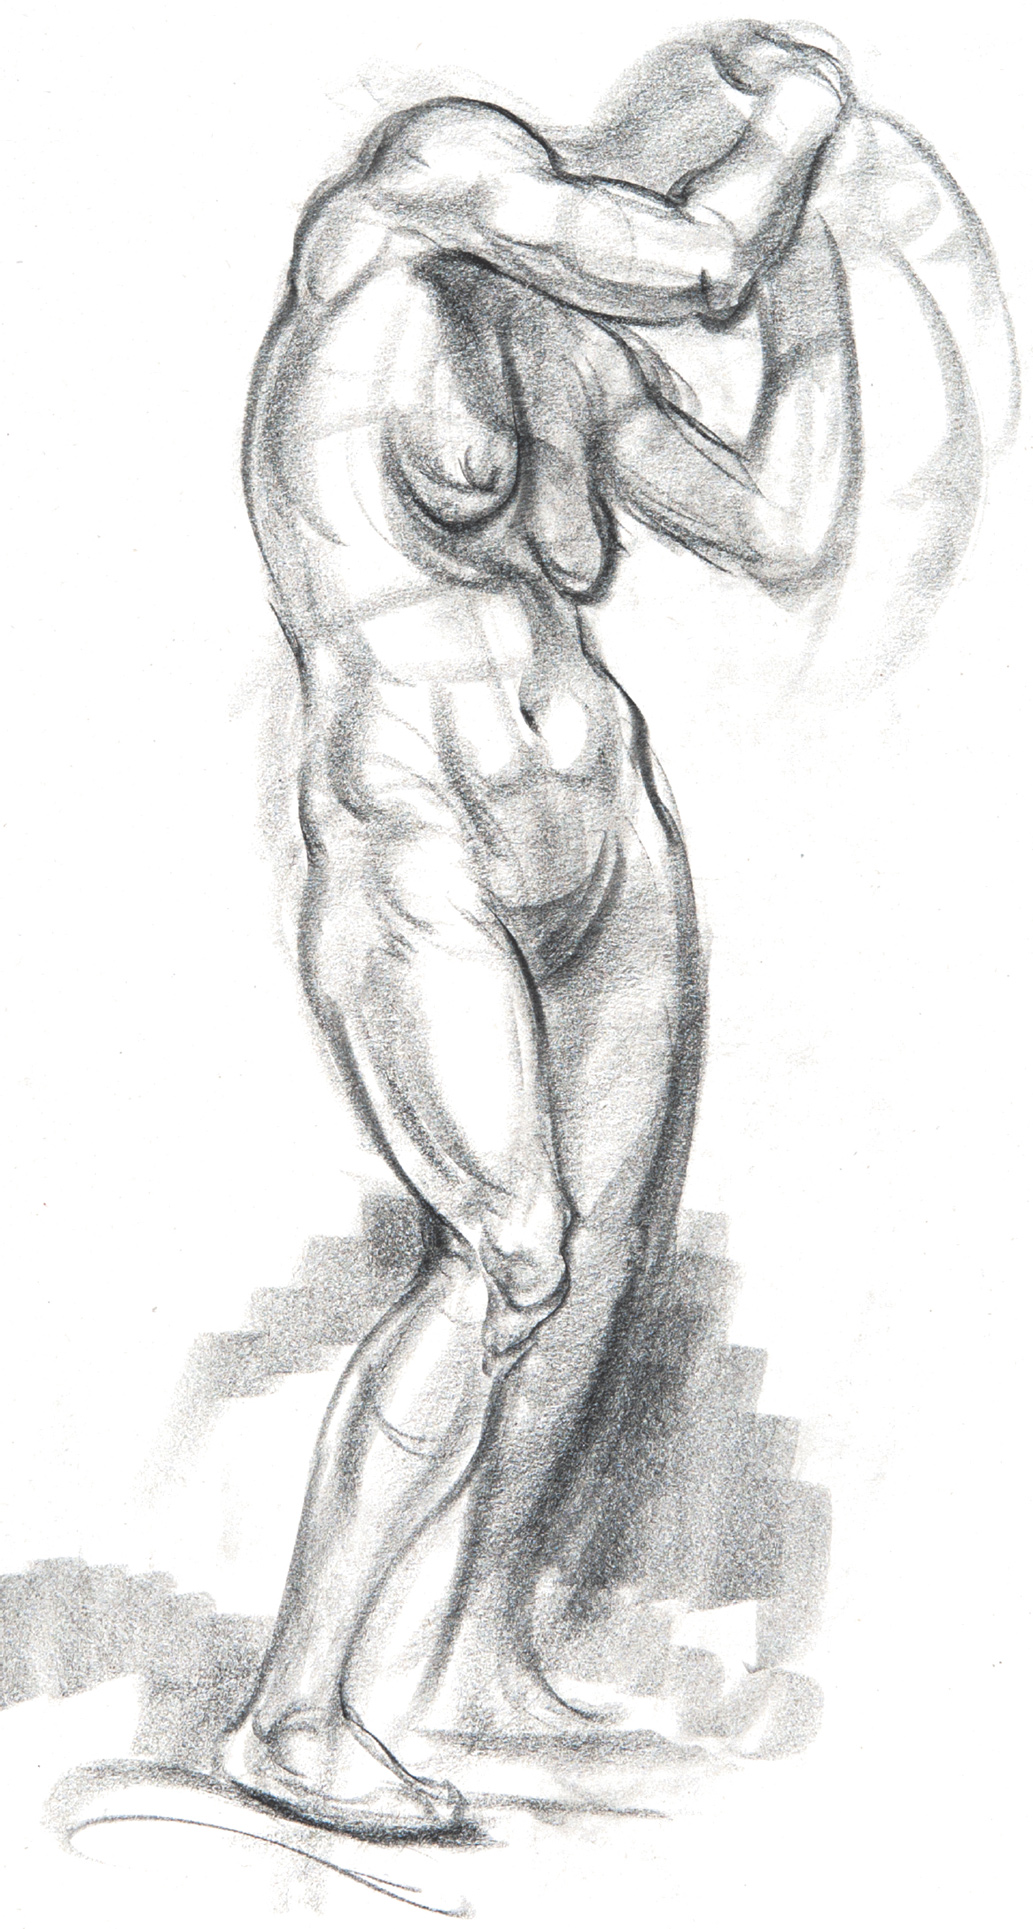
Black Conté crayon on white paper.
Cons: One downside is that, in a crowded room, you may not have a good view of the model. Also, the model might be uninspiring or unskilled, striking poses that are symmetrical and boring or constantly twitching and moving.
Also, a professional model may not show any emotion. That’s fine if, like many traditional fine artists, you are interested only in the dynamics of the figure. But animators, comic book artists, and storyboard artists like to convey moods and emotions—joy, contempt, sorrow, anger, bemusement—in their gesture studies. If the model you’re working from is not displaying any emotion, you can still incorporate mood into your drawing by exaggerating the dynamics of the pose, indicating a suggestion of facial expression, or using expressive tones and lines.
The studio environment may itself be less than ideal. Some studio environments are not conducive to working because of annoying noises, talkative people, bad lighting, or bad temperature control (too cold, too hot). My advice if you encounter any of these problems is to speak up or simply deal with the situation as best you can.
Drawing from Nonprofessional Models
Pros: Serious figurative artists are always hungry to draw from a model and will go to any lengths to practice. But finding a live human model can be challenge. Hiring a professional model or going to a class or workshop might not be possible because of money or time constraints. There is, however, nothing wrong with drawing people you know—friends, family members, or intimate partners. Family members are great for doing quick portrait studies or hand studies. Often, friends will pose for free, but you might encourage them with a promise of compensation (some cash, a meal). Don’t forget to allow your “models” to take small breaks, so you don’t wear them out. If they cannot hold still, then have them pose comfortably while watching TV, reading, relaxing on a couch, sunning themselves on a patio, or taking a nap. Since gesture studies should be done quickly, you can draw several different views of a stationary pose.
Cons: Since these people are not professional models, they may tend to take rather stiff poses, or they may feel self-conscious and be unable to hold still. Try to keep the session fun and relaxed, but also encourage them to hold the pose as best they can.
Drawing from Photographs
Pros: If you are drawing from a photographic image, you don’t have to worry about a model changing position before you are done with a study. That said, it is a good idea to time yourself and to keep the studies brief, otherwise, a “gesture” drawing might turn into a detailed rendering.
Cons: When drawing from a photo, you might be tempted to reproduce the pose too accurately, thereby losing the spontaneous quality gesture studies are supposed to have. So try to keep it loose, and don’t spend more than a few minutes on any drawing.
Drawing from Other Artists’ Drawings
Pros: Sometimes it’s good to look at how other artists approach gesture drawing, for inspiration or to explore a technique. By doing quick little studies from the studies of other artists, living or dead, you can learn how they made their linear or tonal marks—and perhaps how they achieved the sense of magic their drawings convey.
Cons: When you are copying someone else’s spontaneous interpretation of an action pose, your own drawing is unlikely to have the same kind of energy. Remember that you are not trying to become a clone of the other artist, but only to study his or her techniques to give yourself a larger repertoire of skills.
Drawing Ordinary People in Everyday Situations
Pros: Drawing people “in the field”—that is, outside the studio setting—is a great way to study natural body positions, as opposed to the more theatrical poses professional models take. You’ll also encounter an endless variety of body shapes. Possible subjects are everywhere: cafés, museums, shopping malls, zoos, beaches, parks, buses, subways, trains, etc. The key is to try to keep yourself inconspicuous, so you won’t attract unwanted attention. Do be a bit careful about where you sketch: Shop owners may not appreciate you drawing their customers, and I wouldn’t recommend sketching inside houses of worship or at any possibly hazardous site (e.g., a construction zone).
When drawing people in the field, you first need to scan your surroundings to select a subject. If you see a person sitting at a café table in an interesting, relaxed position, try to capture the moment as fast as you can, before the person moves. Since you will be drawing clothed people, you’ll face the additional challenge of adding the garments. Sketch the basic pose, then draw the clothes as simple shapes, indicating any obvious folds to help suggest the movement of the fabric.
Cons: People move, which can be frustrating when you’re trying to sketch them! It can be very annoying to begin an interesting pose, only to have the person get up and leave. Another downside of drawing people in public is that they may notice that you are drawing them—leading to one of several possible reactions. They may become angry and hostile (I was once chased down the street by a person I’d been sketching). They might just get up and leave the premises immediately. Or they might be curious, walking over to you and beginning a polite conversation about the drawing. If you are the sort of person who craves attention, this might be fine. But many artists sketching in the field consider their drawing time precious and become annoyed when they have to talk to strangers.
There are tricks to prevent being detected when you are drawing people in public. One is to avoid “head bopping” (repeatedly looking up when observing and down when drawing). Another is to keep the sketchbook small and inconspicuous—large sketchbooks are a dead giveaway. If you’re working outdoors, wear reflective sunglasses so that people can’t tell exactly whom you’re looking at. Artists tend to have laser-beam eyes because we study people so intently, which means that sooner or later your selected “model” will feel someone staring at him or her and will look around to see who it is. When you notice that, stop drawing and look elsewhere nonchalantly. Continue with the drawing only when your subject gives up looking and resumes whatever he or she was doing.
Drawing from Memory or Imagination
Pros: Once you have a basic grasp of the foundations of figure drawing (proportion, structure, anatomical forms), you can start drawing figures in various poses from memory. Daily or weekly practice in drawing from actual models, looking at other artists’ work, and studying anatomical forms and joint movement will enhance your memory work considerably.
Learning to draw figures from your imagination is well worth the effort. People who do animation, storyboard art, and comic book art work extensively from their imaginations, especially at the beginning stage of a project when they are mapping out their figures’ actions. But this skill is just as important for fine artists and illustrators, who often need to do thumbnail sketches when developing ideas for paintings, illustrations, or sculptures. Once their ideas are sketched out, they can hire models to work from directly or to do a photo shoot for reference material. Being able to work from memory can even be helpful when you’re working from a photo reference. If the figure in the photo isn’t posed exactly as you’d like, you can easily and accurately change the position of a head, arm, or leg in your drawing studies.
Cons: Because this method tests your anatomical skills, it can be excruciatingly challenging. Even if you’ve achieved a certain level of skill at drawing from live models, you may feel like a rank beginner when you first try to draw from your head. But this is typical. Don’t let it frustrate you so much that you no longer want to pursue memory work. The key is to keep practicing. The more you draw from memory and imagination, the stronger your drawings will become.
GESTURE DRAWING OF A FIGURE SITTING ON A PEDESTAL
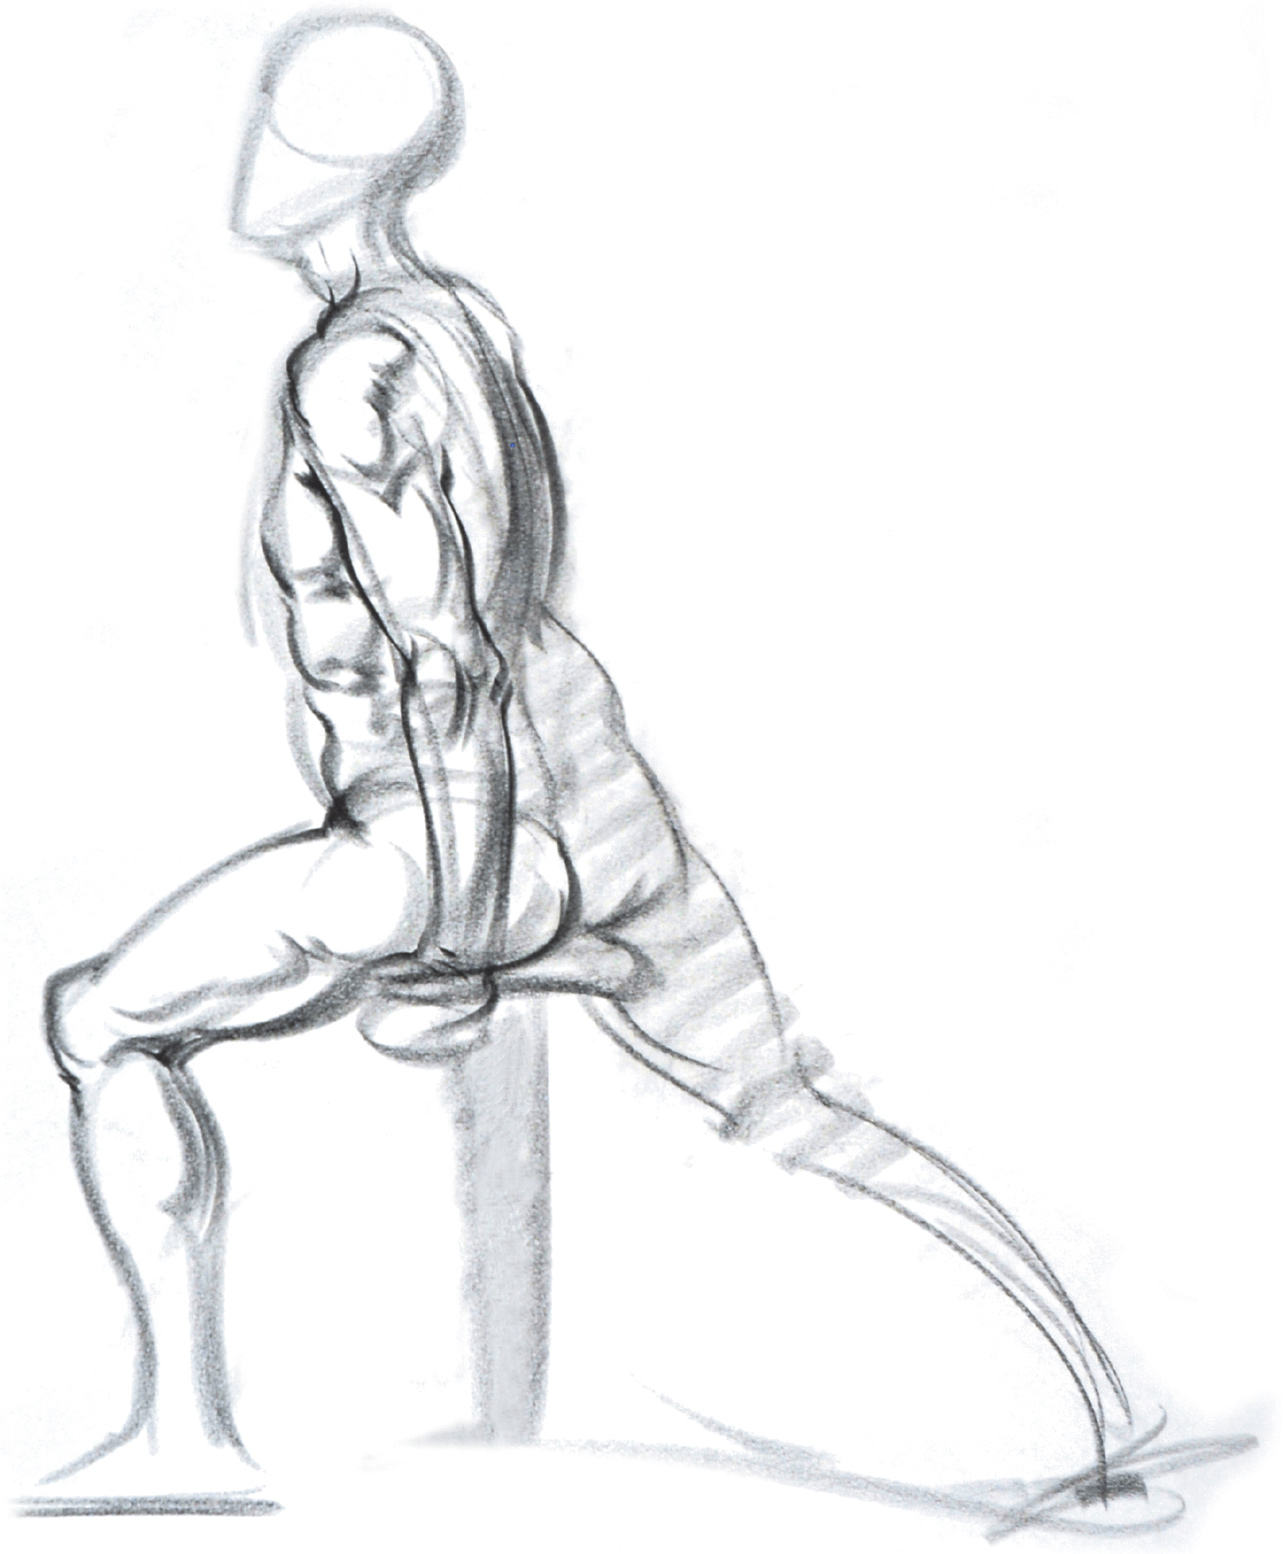
Black Conté crayon on newsprint.
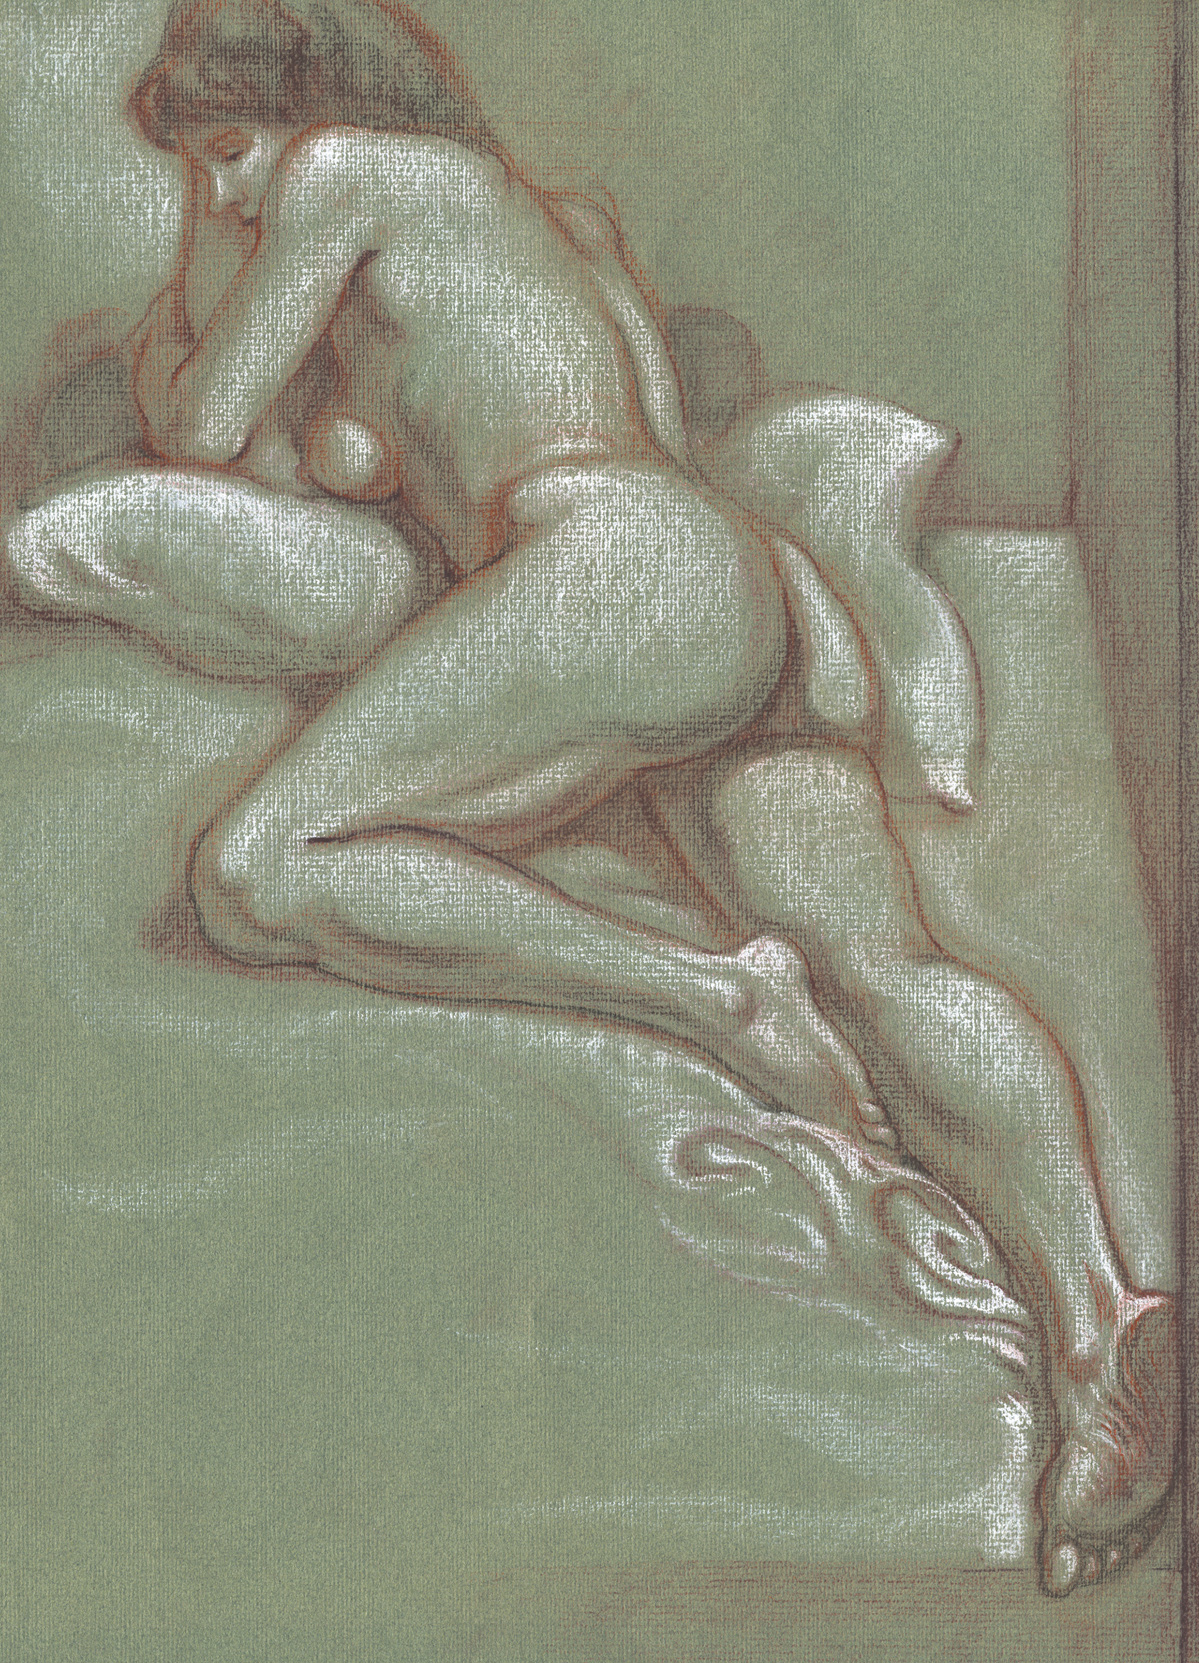
RECLINING FEMALE FIGURE
Sanguine and brown pastel pencils and white chalk on toned paper.